How to resize a digital photograph using PhotoScape X software

=== by Bob Sutherland ===

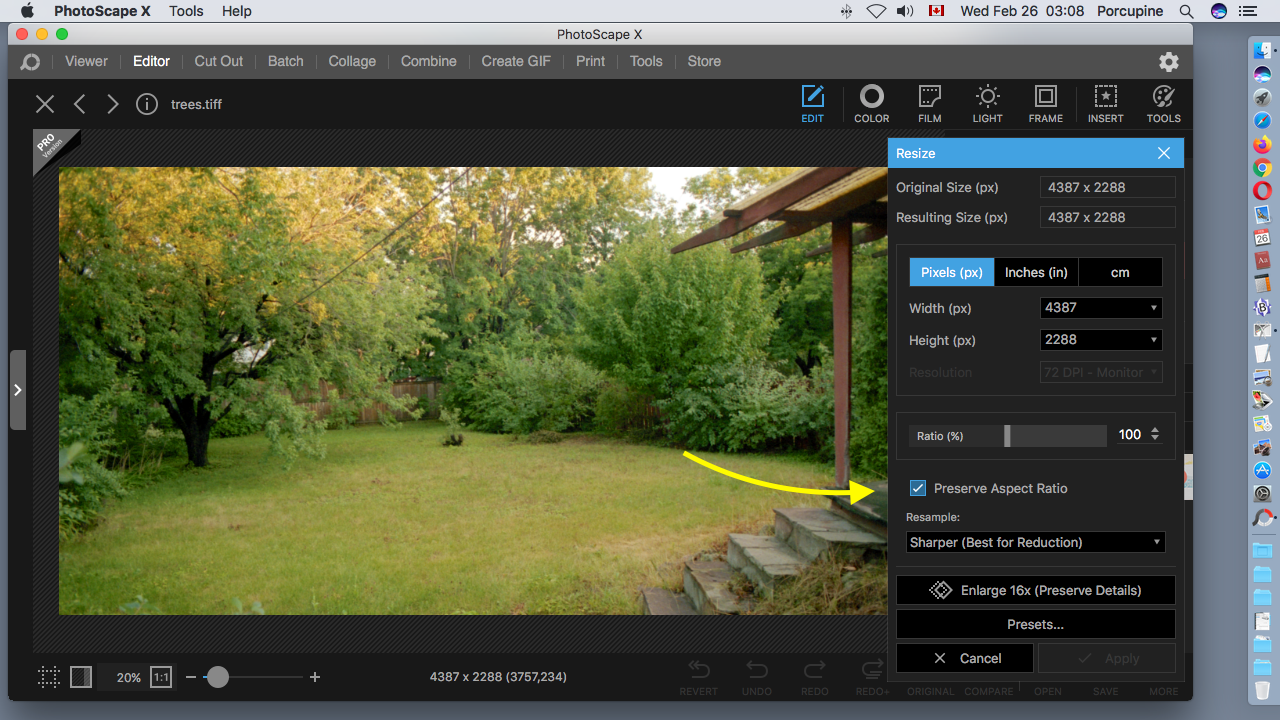
A lesson on how to resize a digital photograph using PhotoScape X by Mooii Tech for Macintosh and Windows computers.

PhotoScape X is a photo editing program that you can download on the Internet from the computer programmer's website. There is a free version of the program that encourages you to upgrade and buy the Pro version.
http://x.photoscape.org

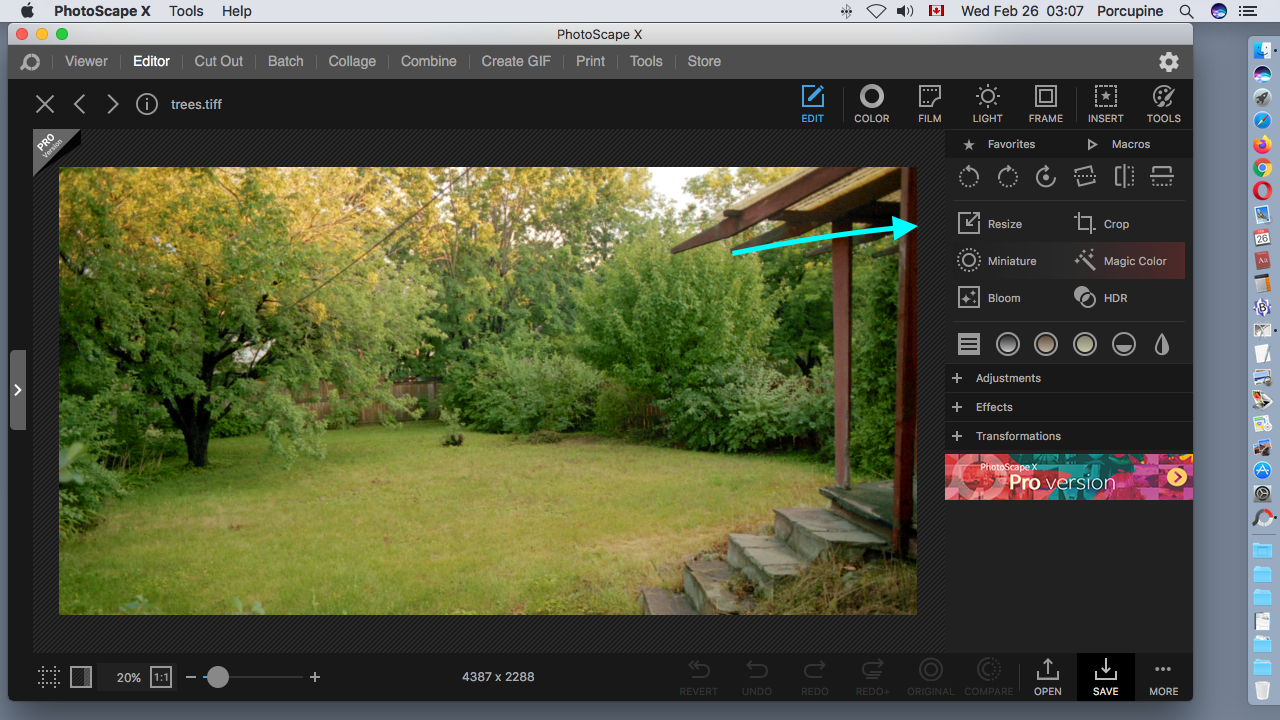
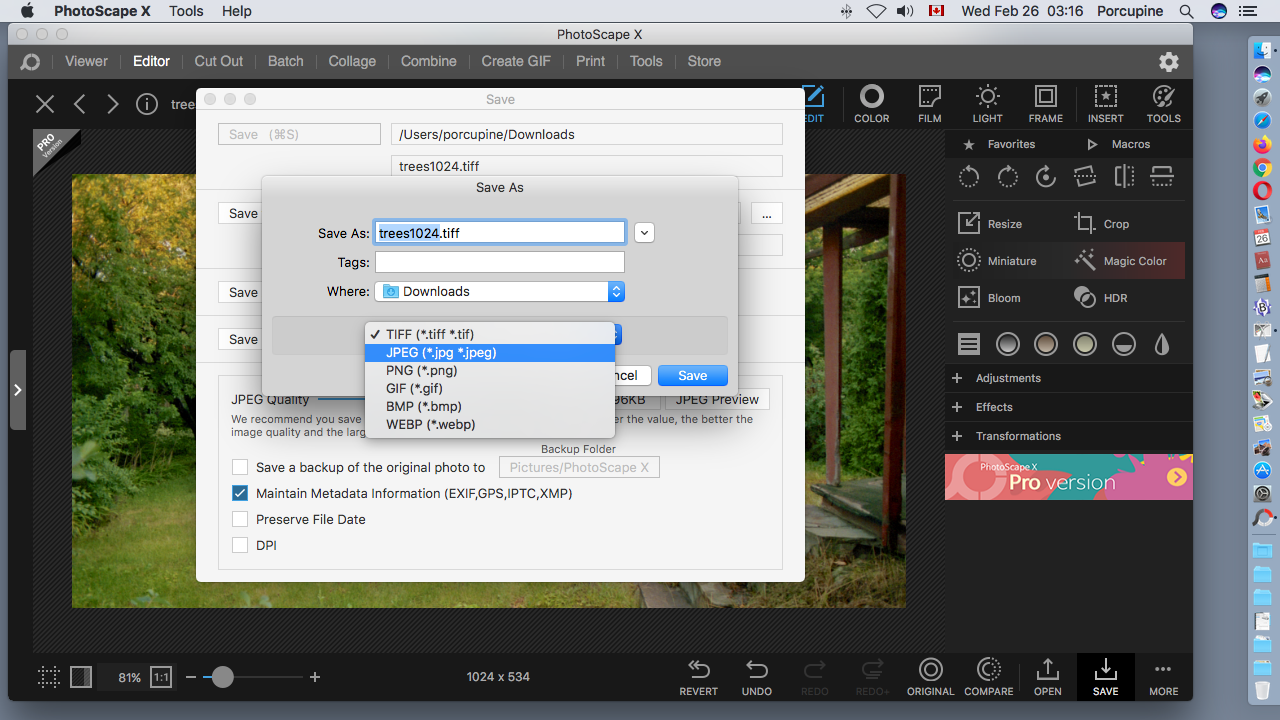
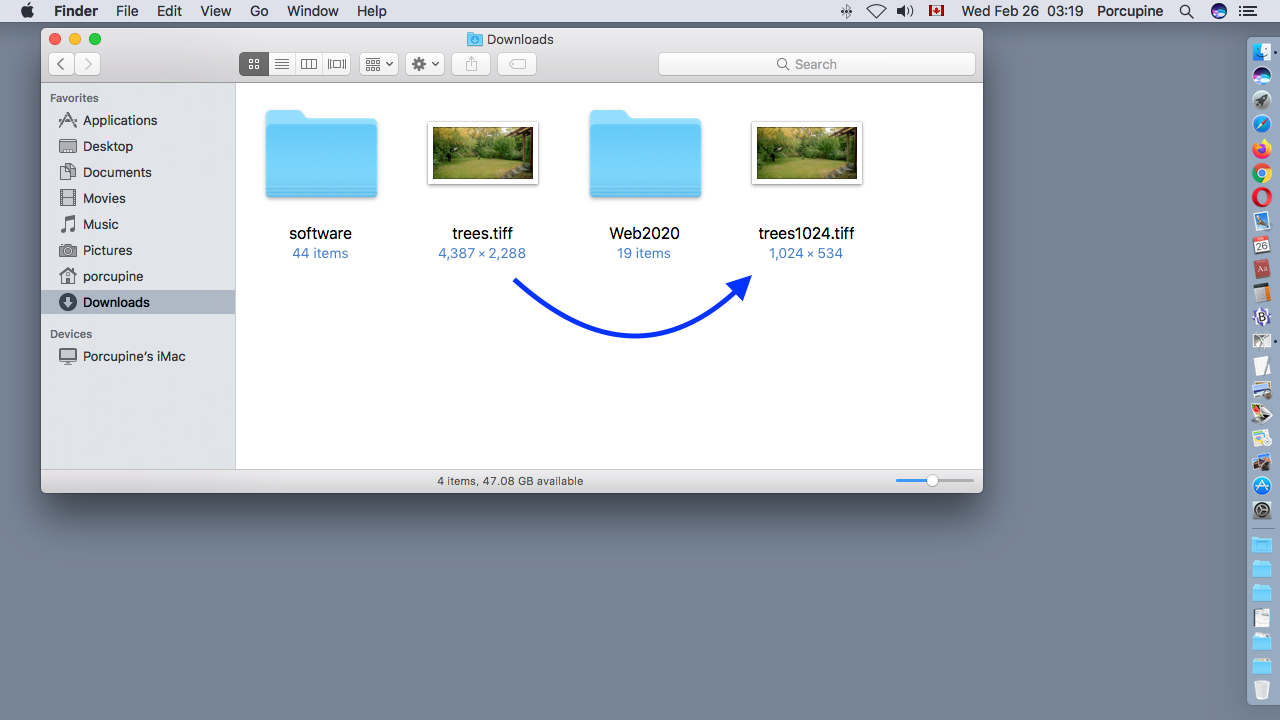
The following are screenshot images I captured of my Macintosh computer screen as I worked through the process of resizing a digital photograph. I do not currently have a Windows computer.


PhotoScape X application icon
This is what the PhotoScape X application icon looks like.

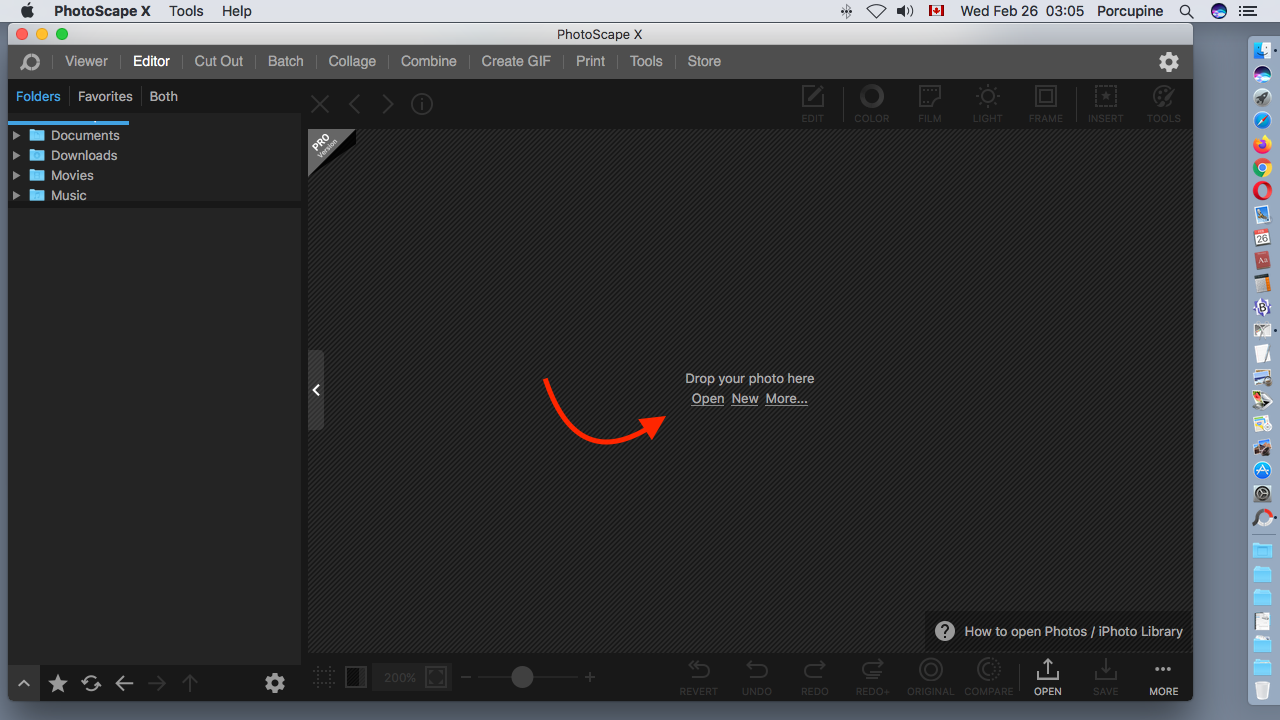
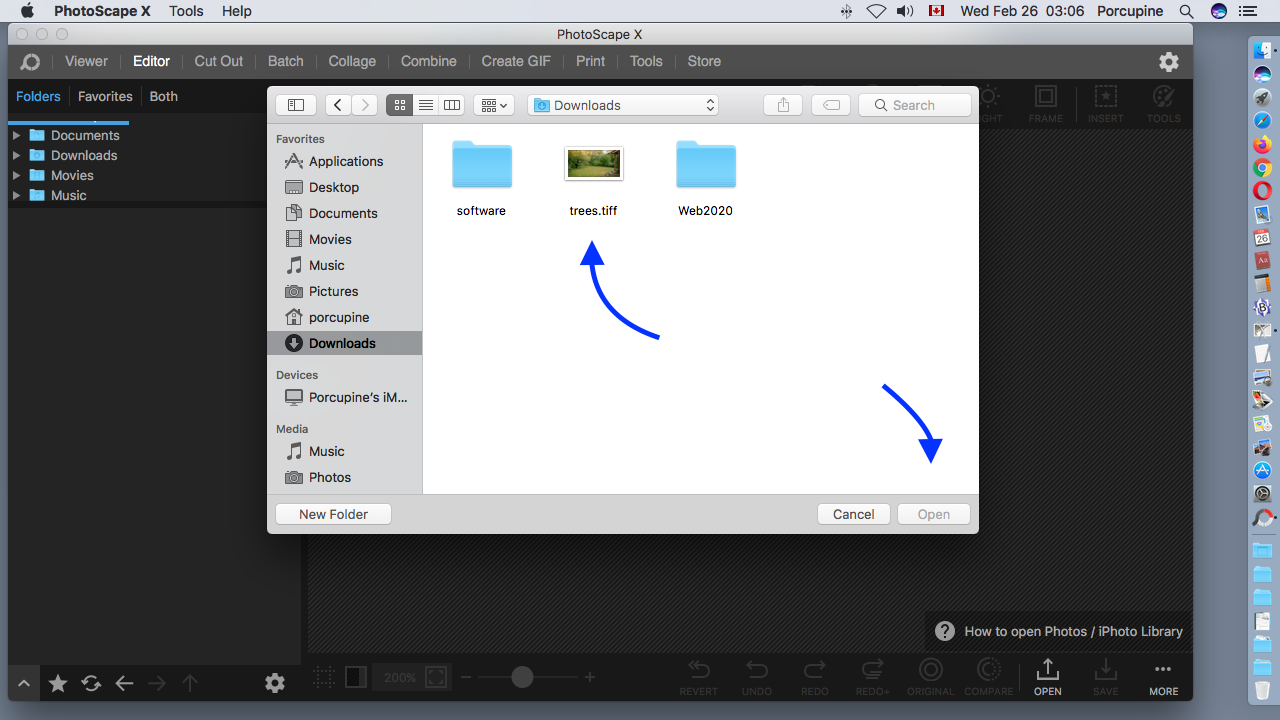
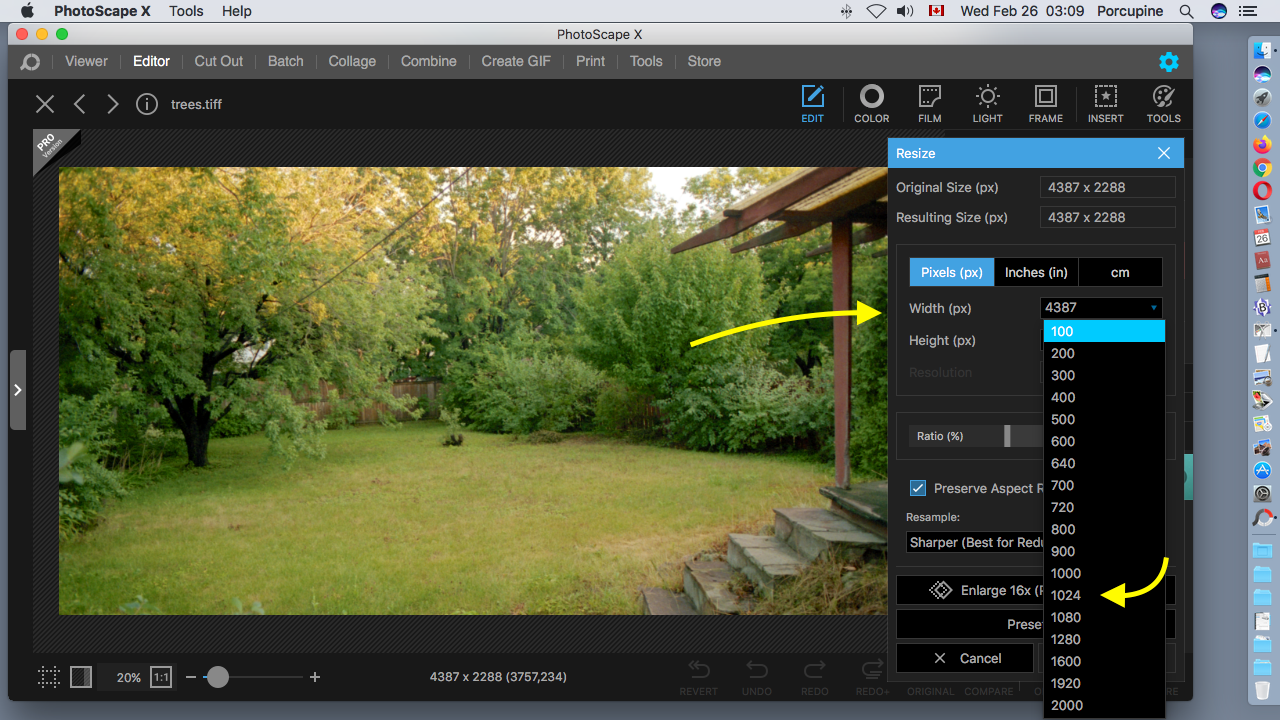
The first step is to start up the PhotoScape X application and open a file that contains a photograph.

Screenshot
Here is the window I saw when I started up the PhotoScape X program. I mouse clicked on the word Open in the centre of the screen.
Screenshot
Here is a window showing the folders of my computer account. I searched and found the photograph file that I want to resize.
Screenshot
Here is my photograph that I want to resize. It is a picture of the backyard behind an old house. How convenient, the word Resize is there in the menu beside my photograph. I mouse clicked on Resize.
Screenshot
The menu to the right of my photograph changes to become the Resize menu. The first thing I check is to make sure there is a checkmark in the box for Preserve Aspect Ratio.
Screenshot
I mouse clicked in the box beside Width and this list of suggested photograph dimensions popped up. I selected 1024 pixels as the new width of my photograph.
Screenshot
The PhotoScape X application automatically changed the Height dimension of my photograph to preserve its shape. I now had to mouse click the Apply button in the bottom right corner of the window.
Screenshot
If you compare this screenshot to the previous screenshot you will notice the changes of numbers below my photograph. The dimensions of my photograph has changed from 4387 x 2288 pixels to the smaller size of 1024 x 534 pixels. My original photograph was displayed at a zoom of 20% to fill the available space but now the resized photograph is being displayed at 81% zoom. I now have to save the new photograph file with a new filename.
Screenshot
This is the Save window. I mouse clicked on the Save As button.
Screenshot
I changed the filename by adding the number 1024.
Screenshot
Here is a list of the different file types available when saving a photograph.
Screenshot
Here is the final screenshot of this lesson showing the pixel dimensions of my original photograph file and the smaller resized photograph file we just created.