How to resize a digital photograph using Affinity Photo software

=== by Bob Sutherland ===

A lesson on how to resize a digital photograph using Affinity Photo by Serif for Macintosh, Windows and iPad.

Affinity Photo is a photo editing program for professionals that you can download and purchase on the Internet from the company's website:
https://affinity.serif.com/en-gb/photo/

The following are screenshot images I captured of my Macintosh computer screen as I worked through the process of resizing a digital photograph. I do not have a Windows computer or iPad to test those versions of the software.


Affinity Photo application icon
This is what the Affinity Photo application icon looks like on my Macintosh computer.

The first step is to start up the Affinity Photo application and open a file that contains a photograph. There are many different ways you can accomplish this task.

On a Macintosh computer you may find the Affinity Photo.app icon in the Dock at the bottom or side of your screen. You should find the Affinity Photo.app among all your application icons displayed by the Launchpad. Alternatively you can look for the Affinity Photo program in the Applications folder on your hard disk.
Screenshot
This is the Affinity Photo window I saw after starting up the program.
Screenshot
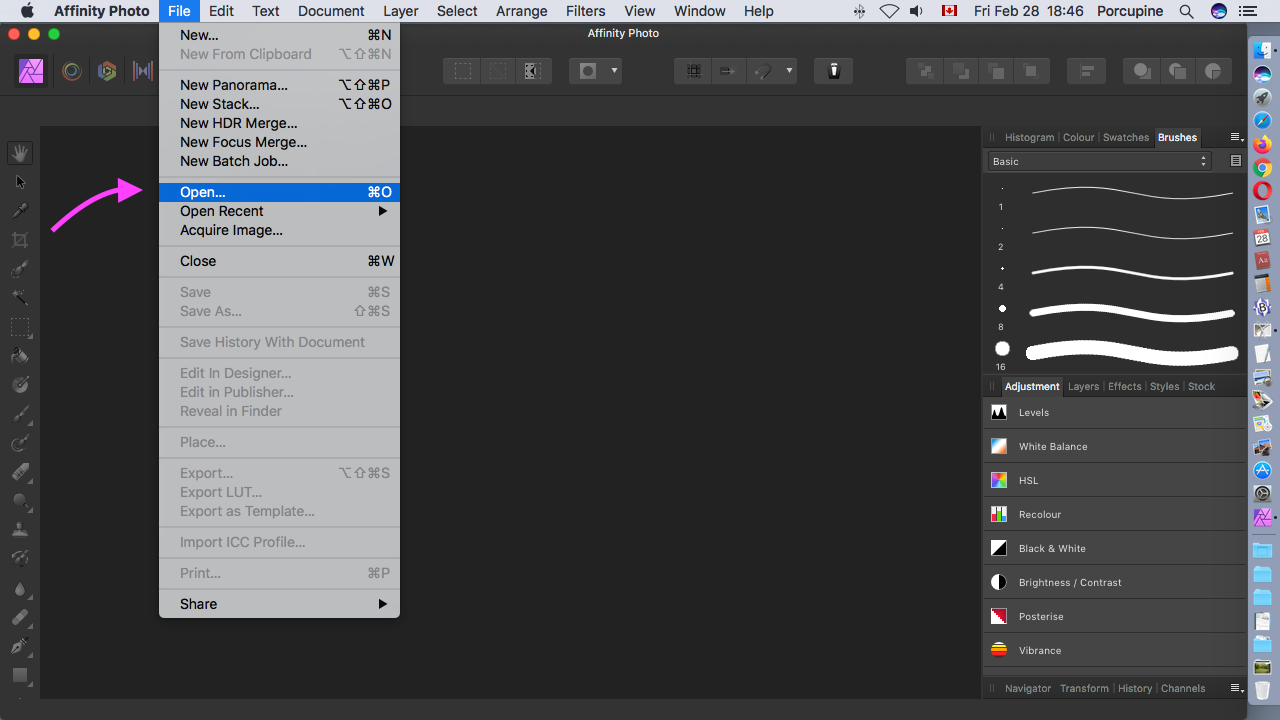
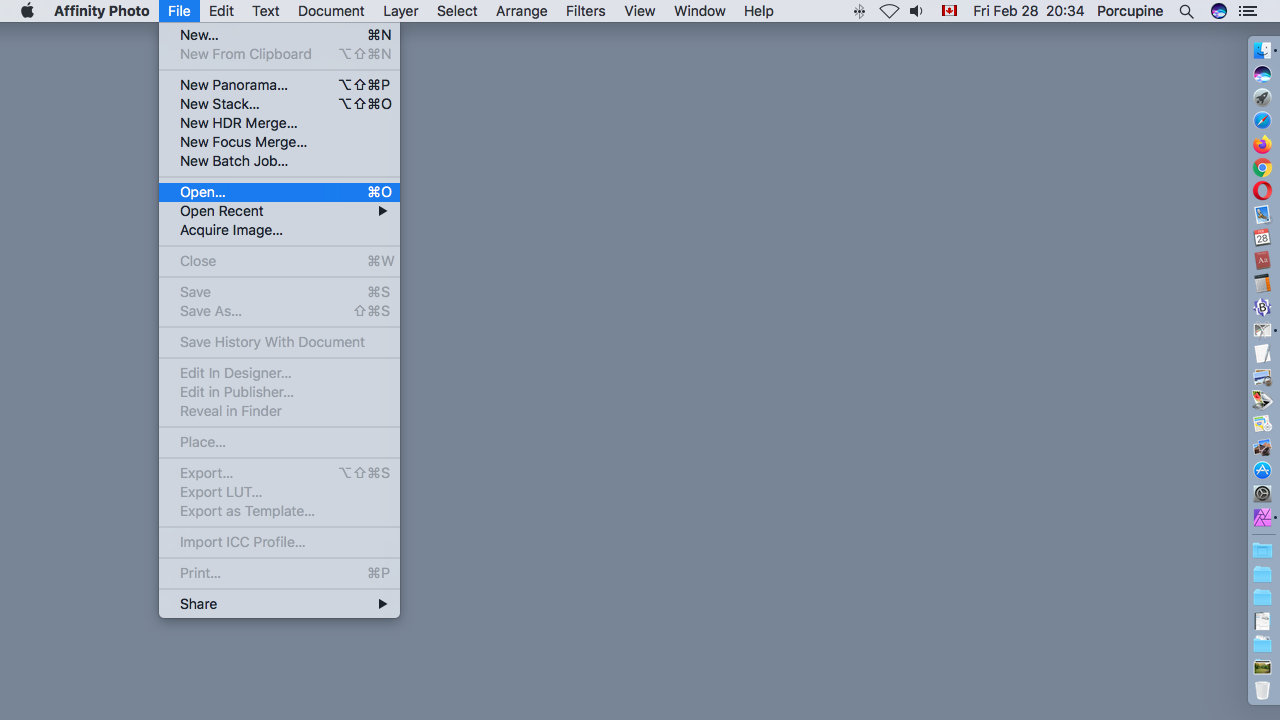
In the Affinity Photo menu across the top of the screen select the File menu and Open command.
Screenshot
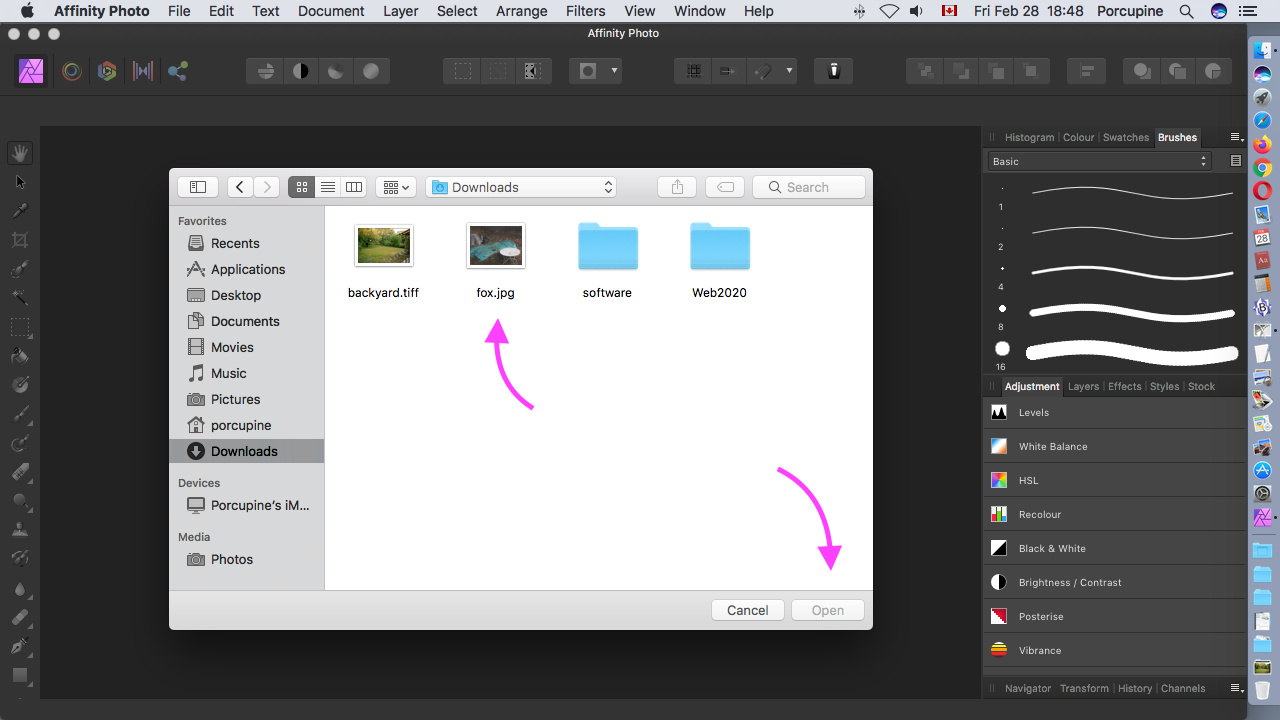
This window will appear allowing you to search the folders and files of your computer account to find the photograph that you want to resize.
Screenshot
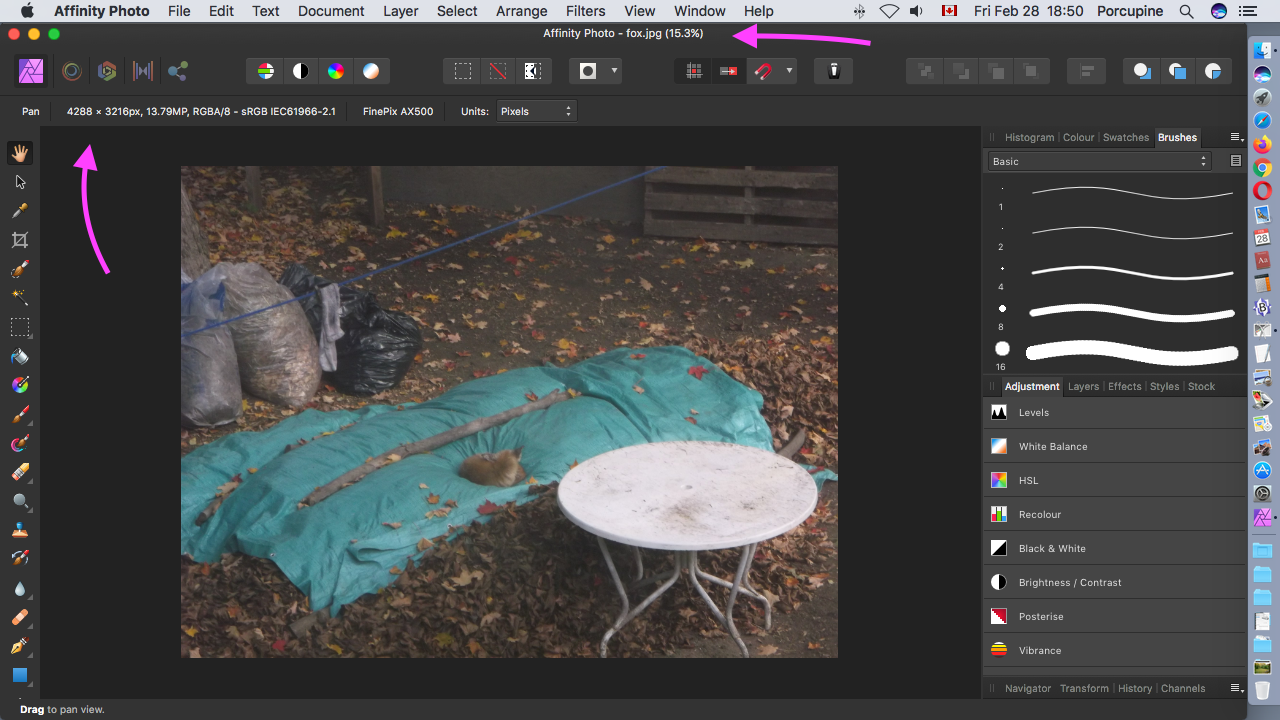
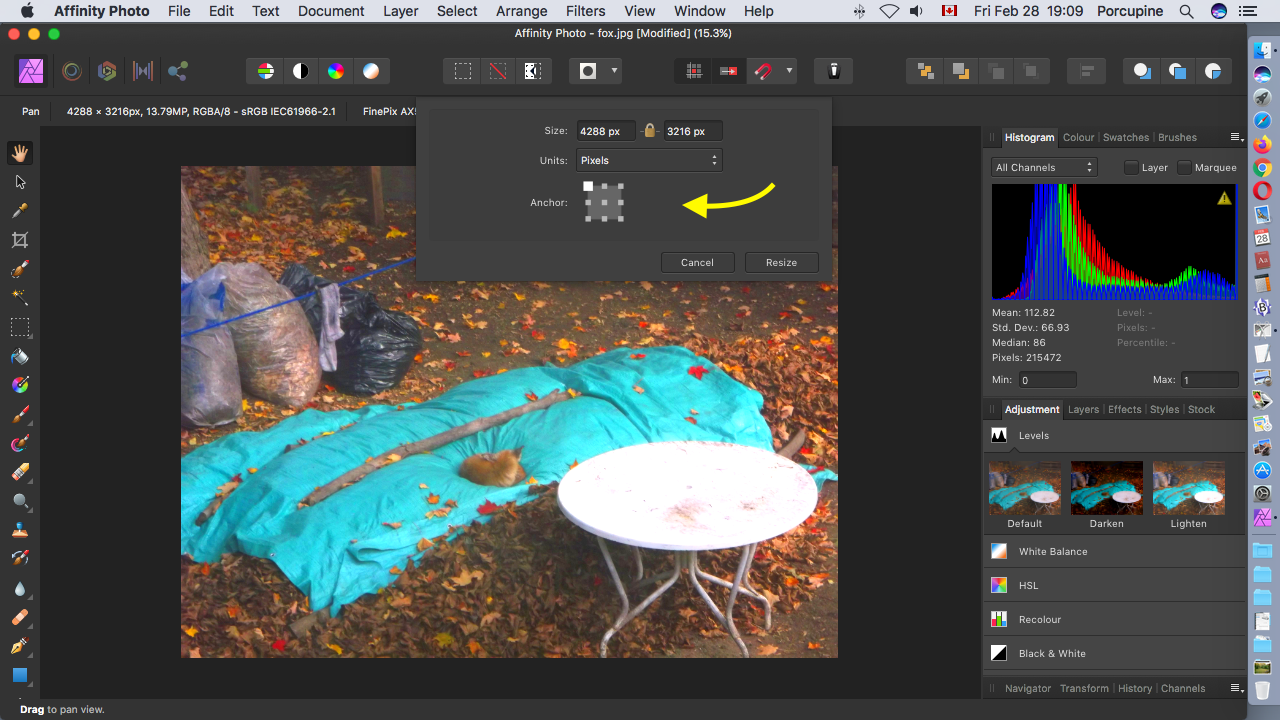
Here is the photograph that I want to resize. There is a tarp covering a pile of leaves. There is a fox sleeping on top of the tarp. Now you know why I seldom take any wildlife photographs. This fox has been eating or scaring away any animal that moves slow enough for me to take its picture.

The left arrow indicates where the size of the photograph as measured in pixels is listed. The right arrow shows the photograph is currently being zoomed down to be displayed at 15.3% of its size.
Screenshot
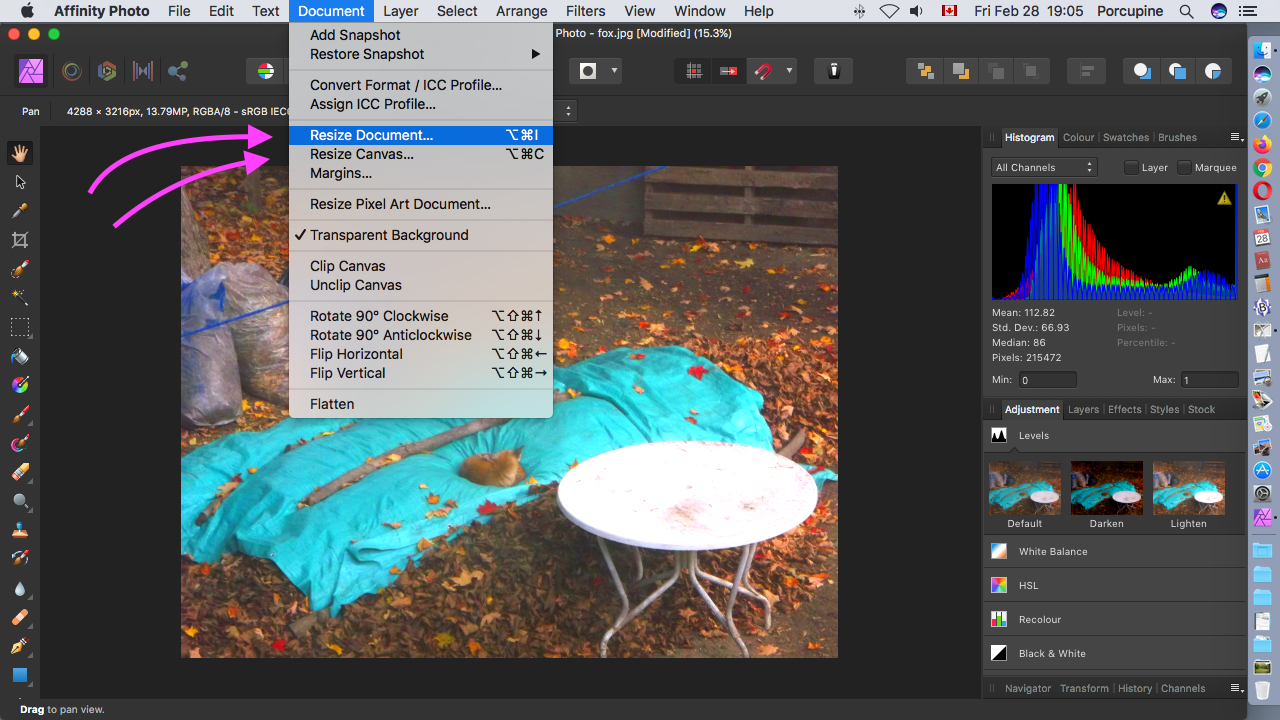
I randomly played around in the menus until I managed to brighten up the colours in this photograph. Now it is time to work on resizing the photograph. In the Affinity Photo menu across the top of your screen select the Document menu. We appear to have a choice of two commands: Resize Document and Resize Canvas.
Screenshot
This is the window I saw after choosing Resize Canvas. Do you see that square of nine dots in a 3 x 3 grid. That is the hint that this command is used for precise cropping of an image which is not what we want to do. I mouse clicked on the Cancel button.
Screenshot
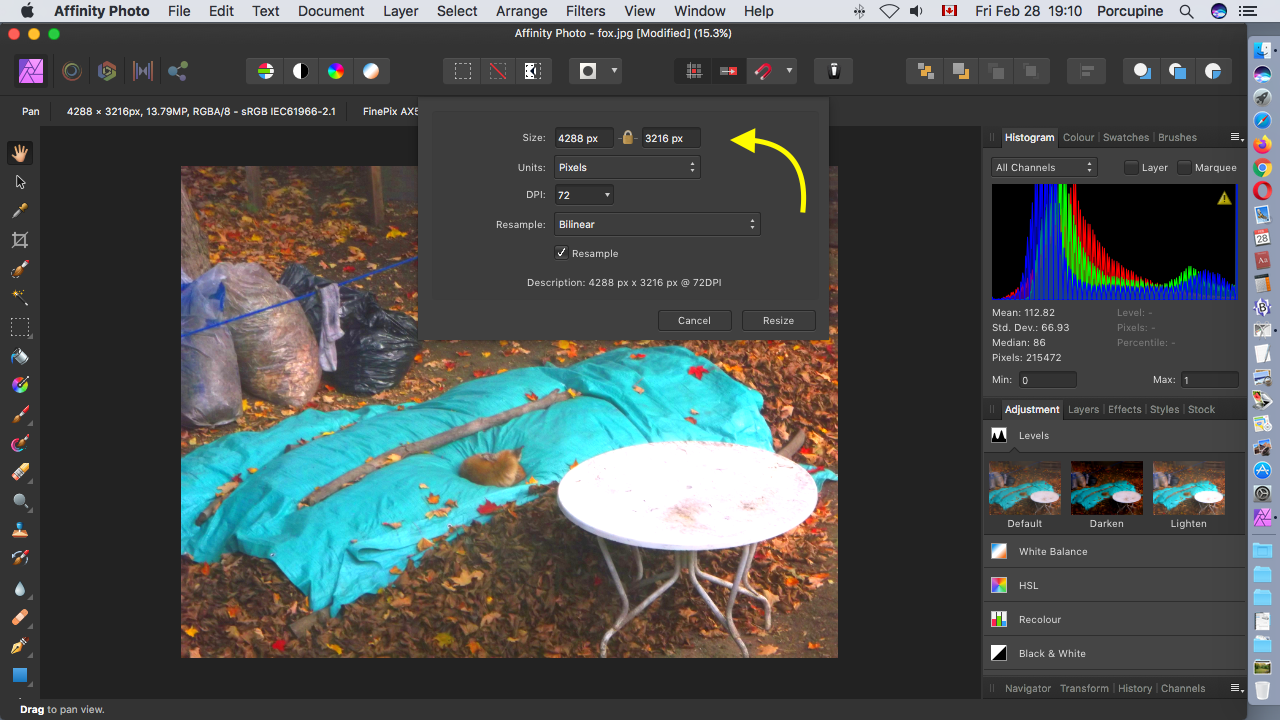
Here is the window I saw after choosing Resize Document in the Document menu. There is a closed padlock beween the width and height dimensions beside the word Size. If I change one of the numbers the other number should automatically change to maintain the aspect ratio between width and height. This is the hint that we are in the right place to resize our photograph smaller while maintaining its width to height proportions.
Screenshot
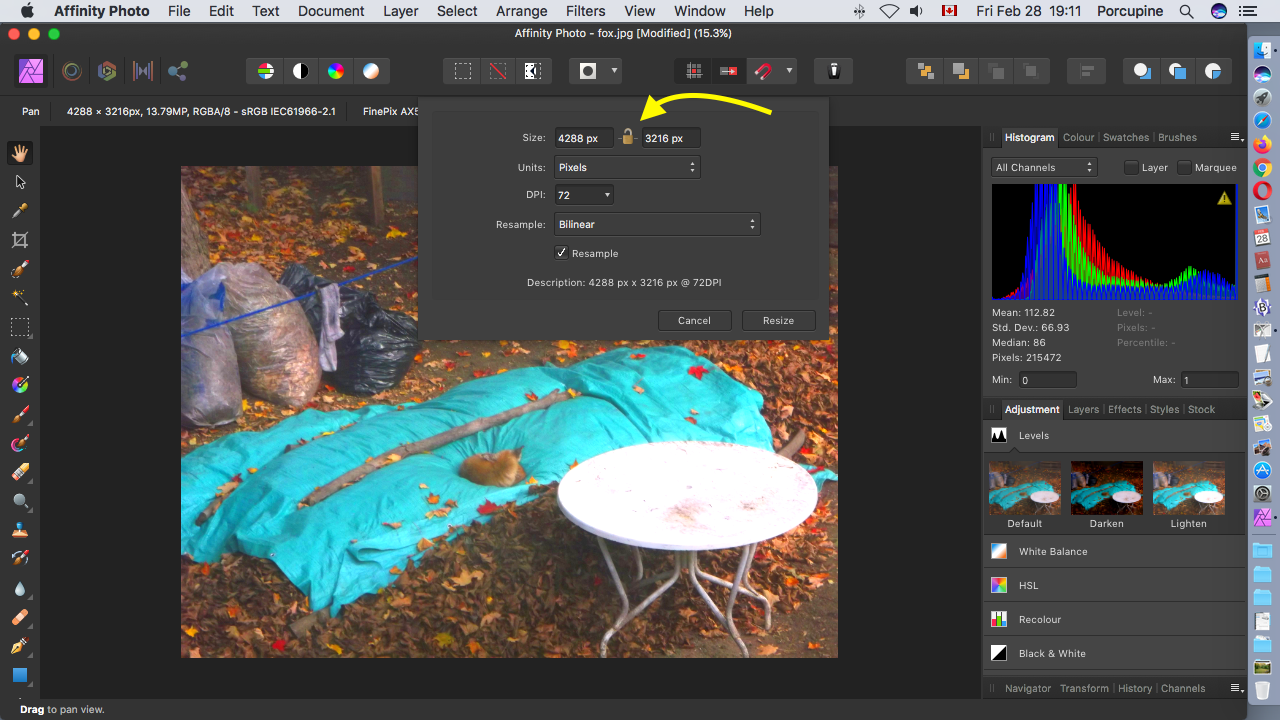
Here I have mouse clicked on the padlock and it is now open. If I change either of the numbers in the boxes beside the word Size the shape of the photograph will change. I do not want to do that!
Screenshot
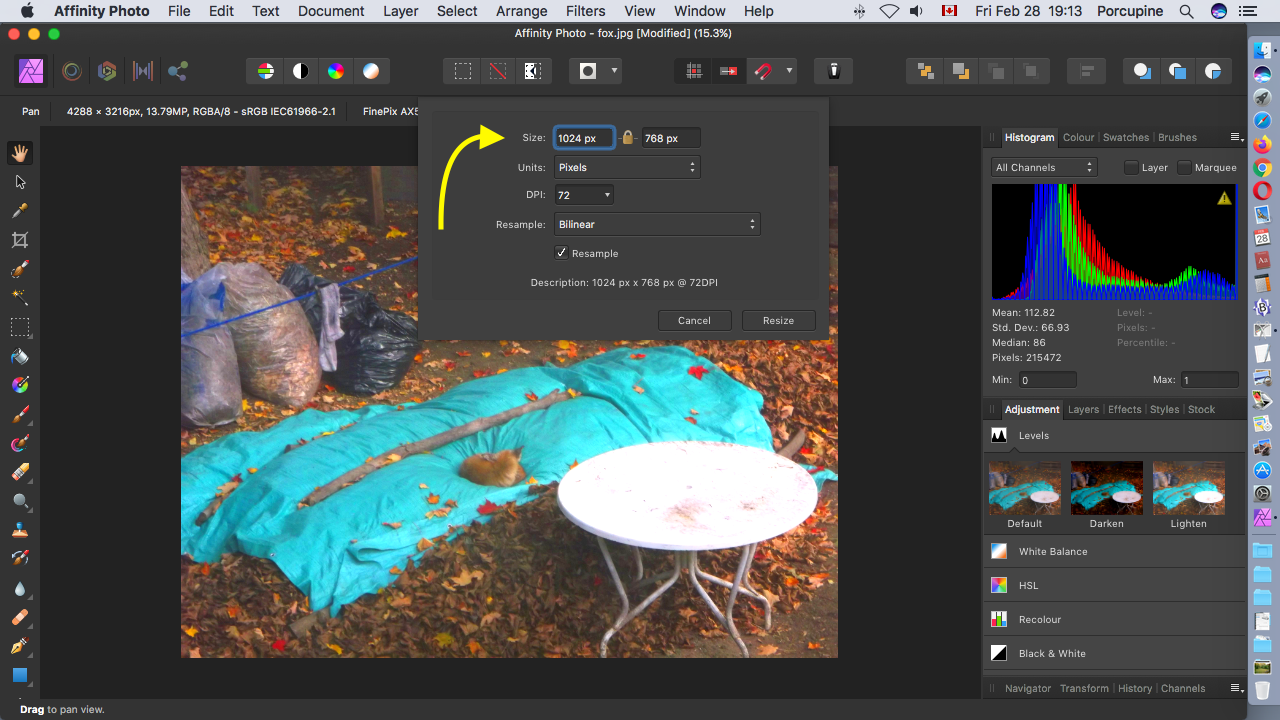
I have closed the padlock by mouse clicking on it. I have changed the width of the photograph to 1024 pixels. The computer has automatically calculated the height of the photograph to maintain its shape.
Screenshot
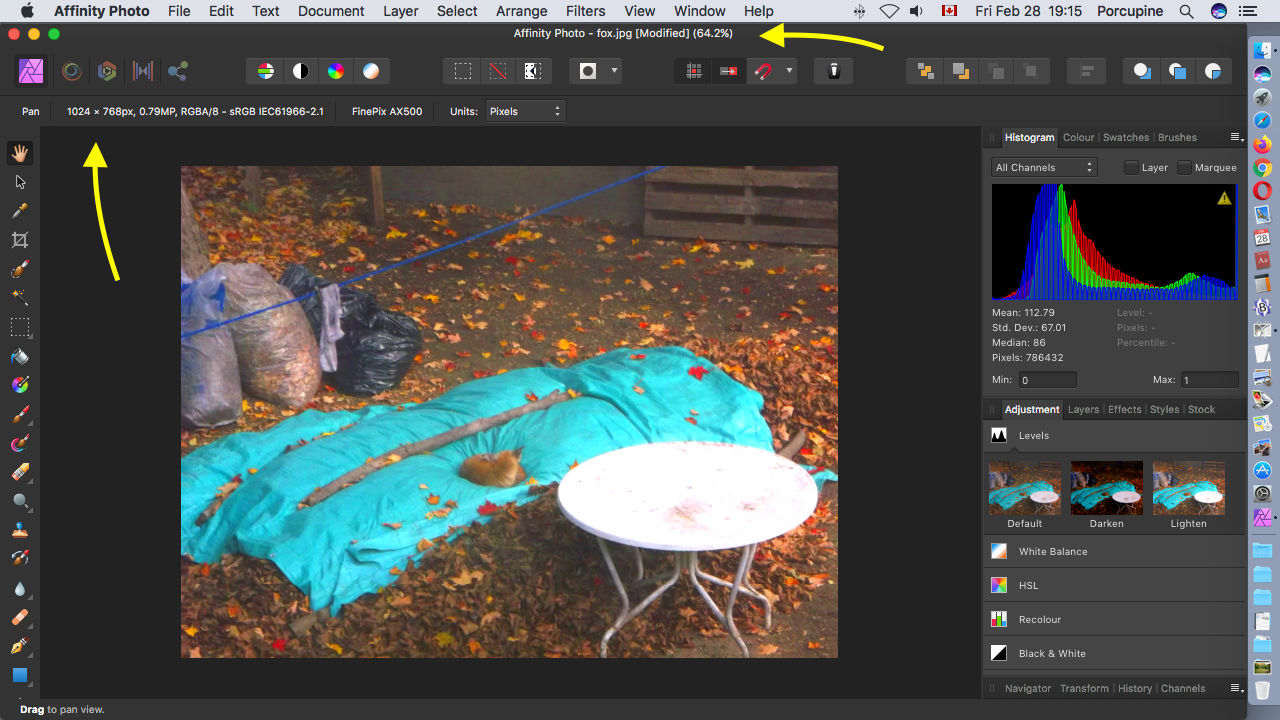
Here is my resized photograph. The only difference that you are likely to notice is that the pixel dimensions changed and the display zoom size changed as shown by the arrows.
Screenshot
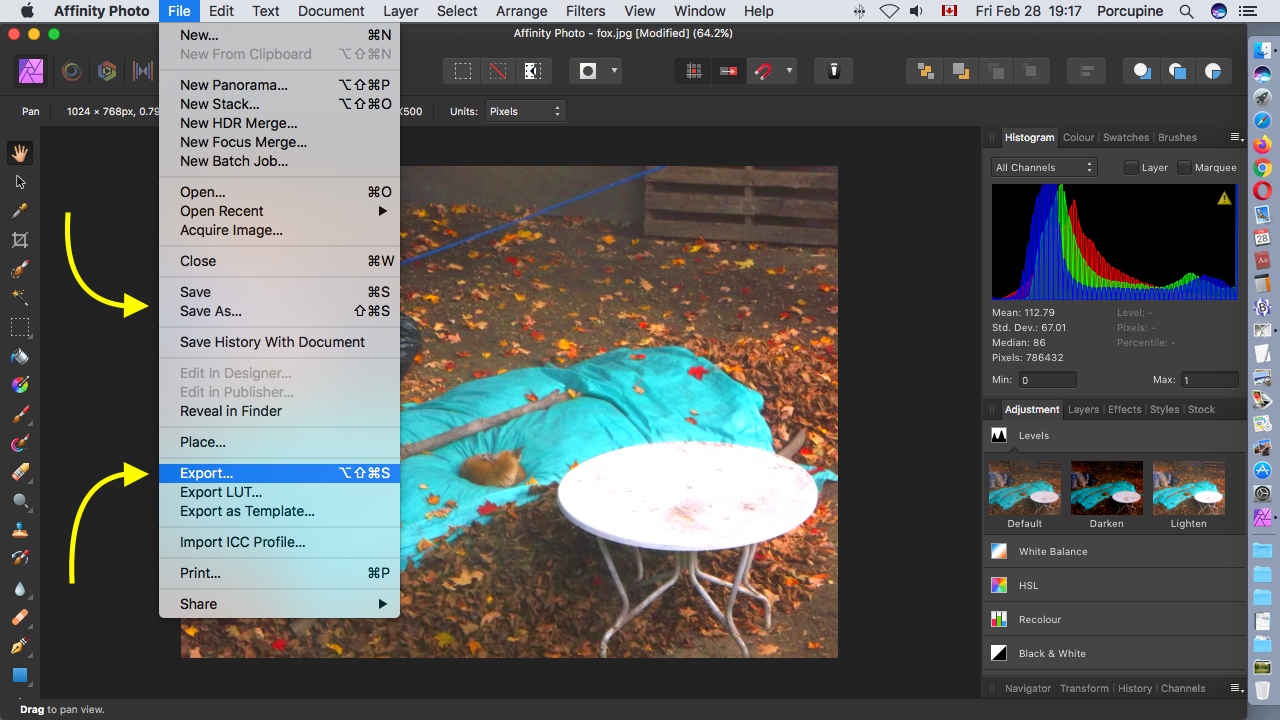
Now it is time to save my resized photograph using a different filename. In the Affinity Photo menu across the top of the screen the File menu has the commands Save As and Export.
Screenshot
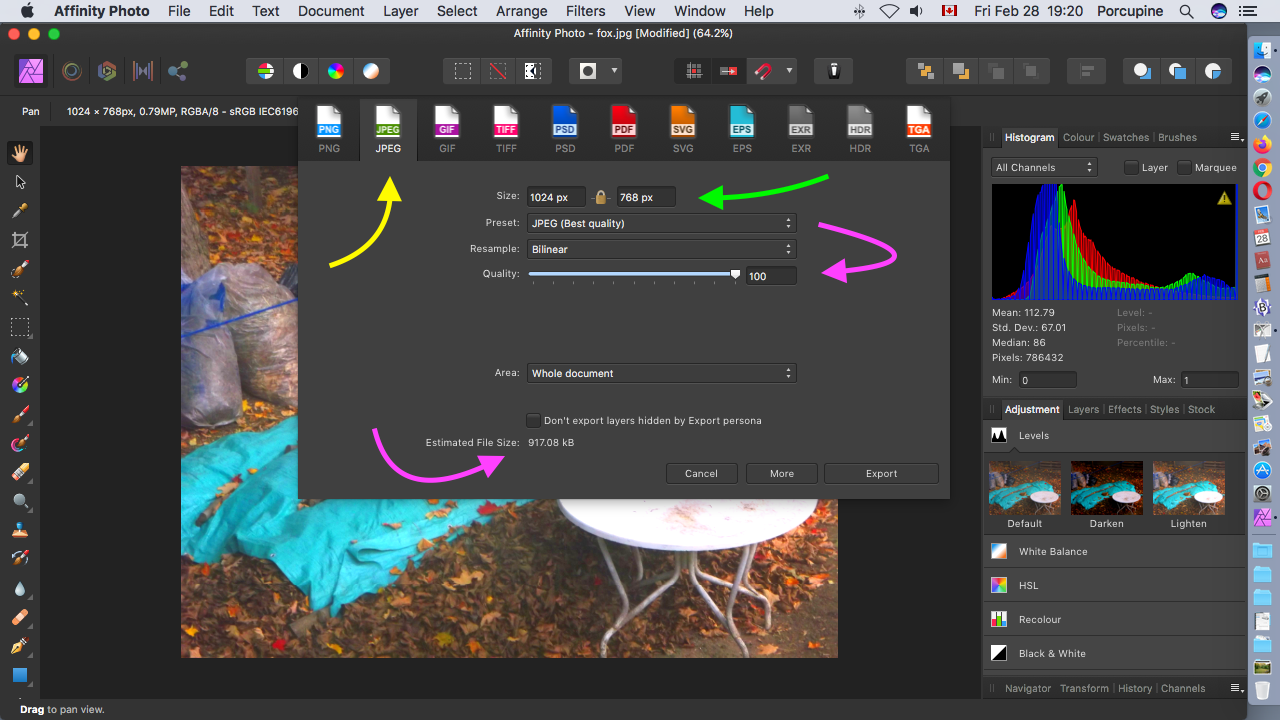
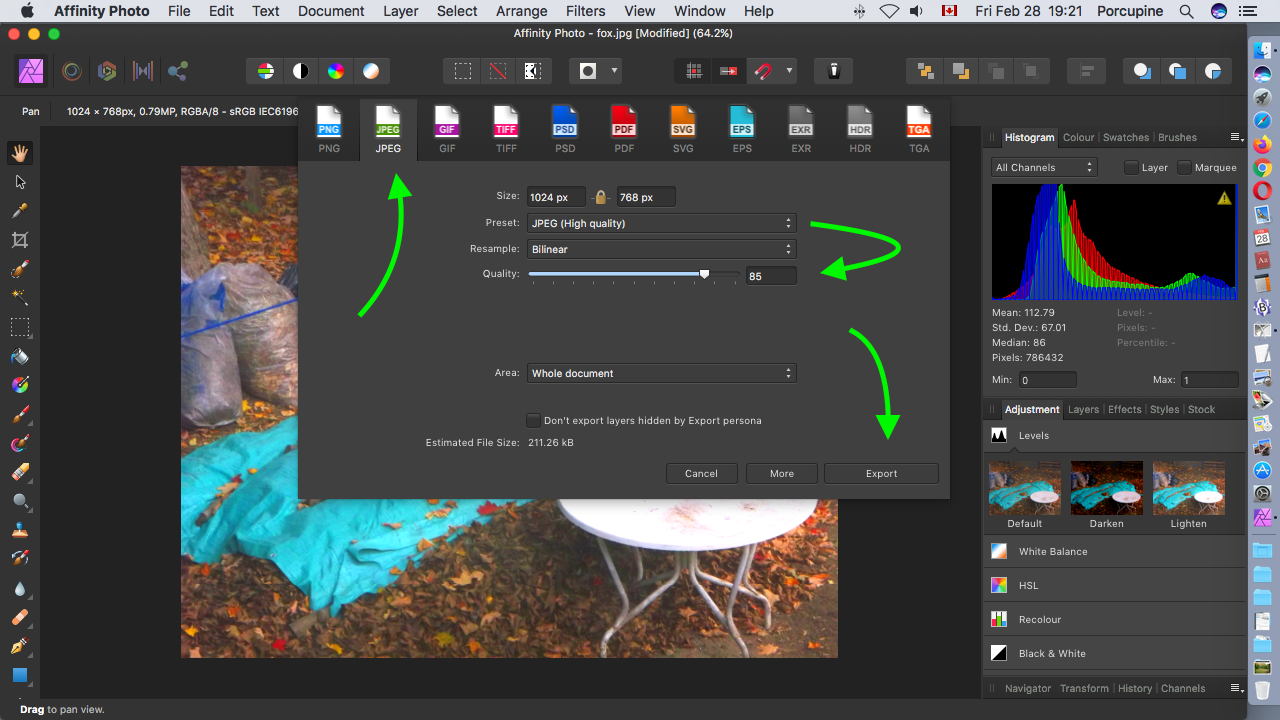
Here is the Export window. The available file types are represented by little icons across the top of the window. Currently the JPEG file type is highlighted. The Preset box has a few options. When I choose JPEG (Best quality) the slider on the Quality line moves to the end at number 100. The Estimated File Size is 917.08 kB.
Screenshot
I have changed the Preset to JPEG (High quality). The Quality slider is now at 85. The Estimate File Type is 211.06 kB.
Screenshot
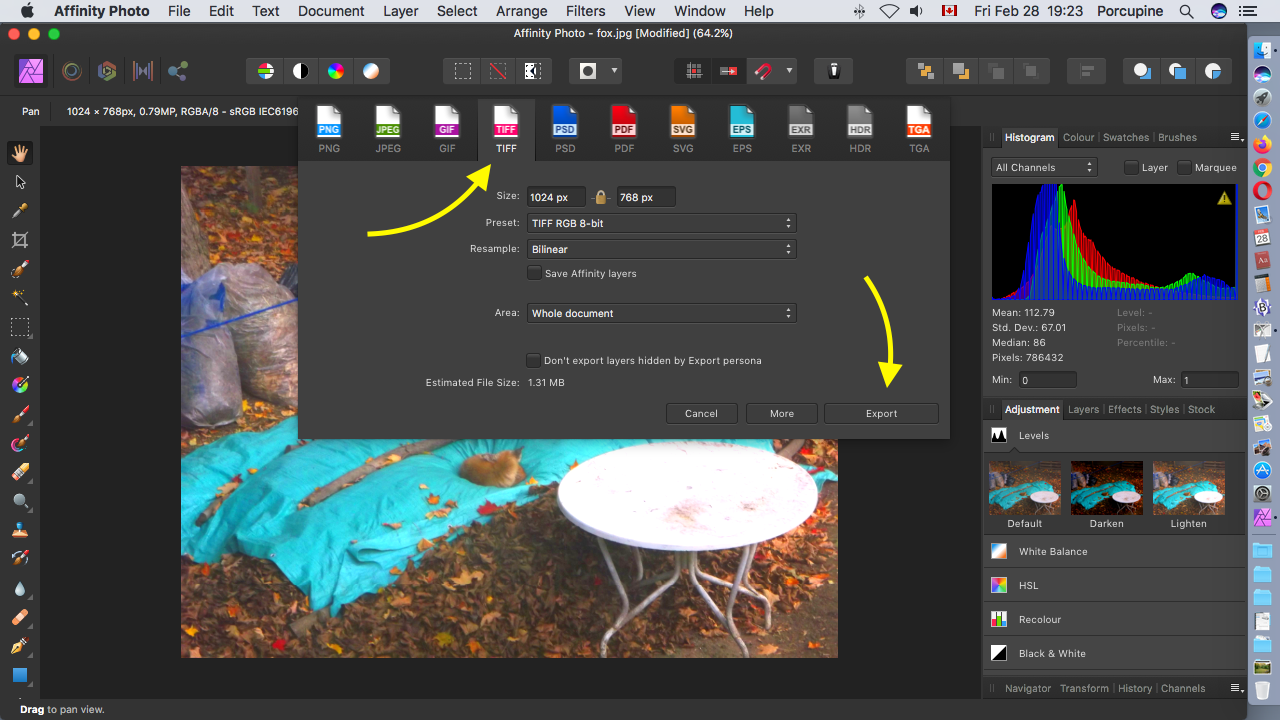
Here is what the Export window looks like when I change the file type to TIFF.
Screenshot
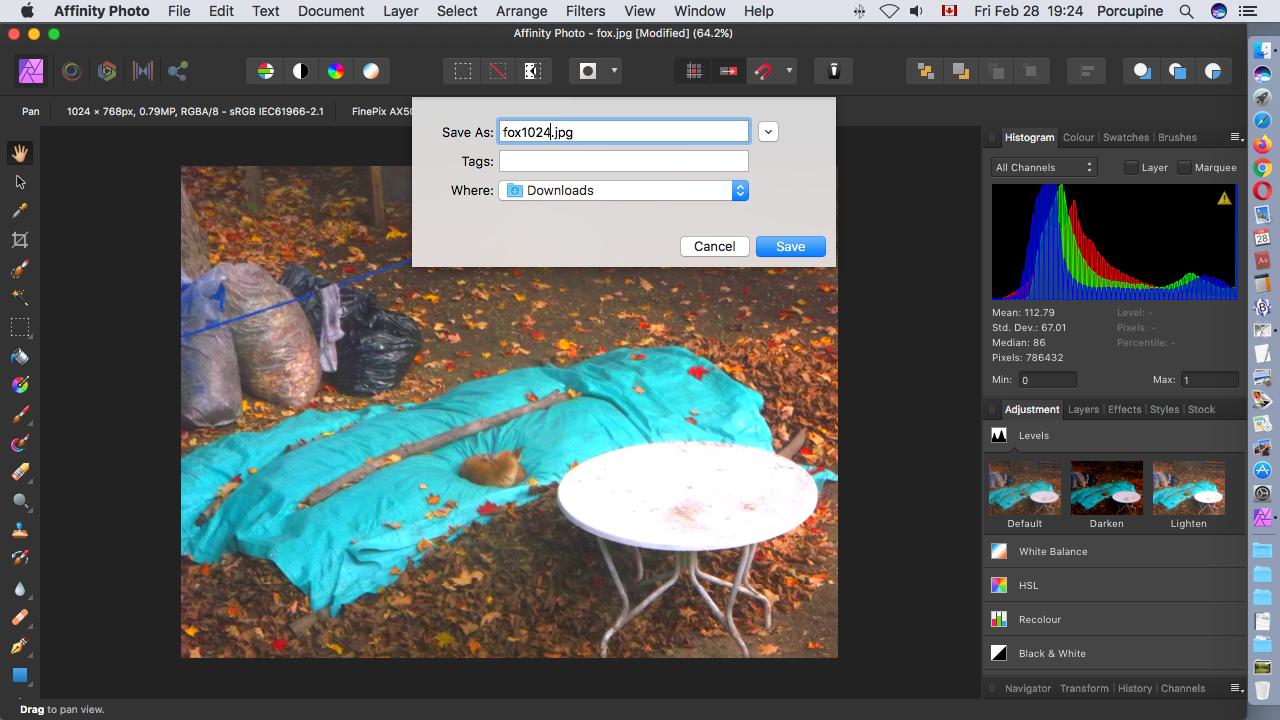
When you mouse click on the Export button in the Export window you are taken to this Save As window. If I had chosen Save As back in the File menu I would have been taken directly here bypassing the Export window. I have chaned the filename by adding the number 1024 before mouse clicking the Save button.
Screenshot
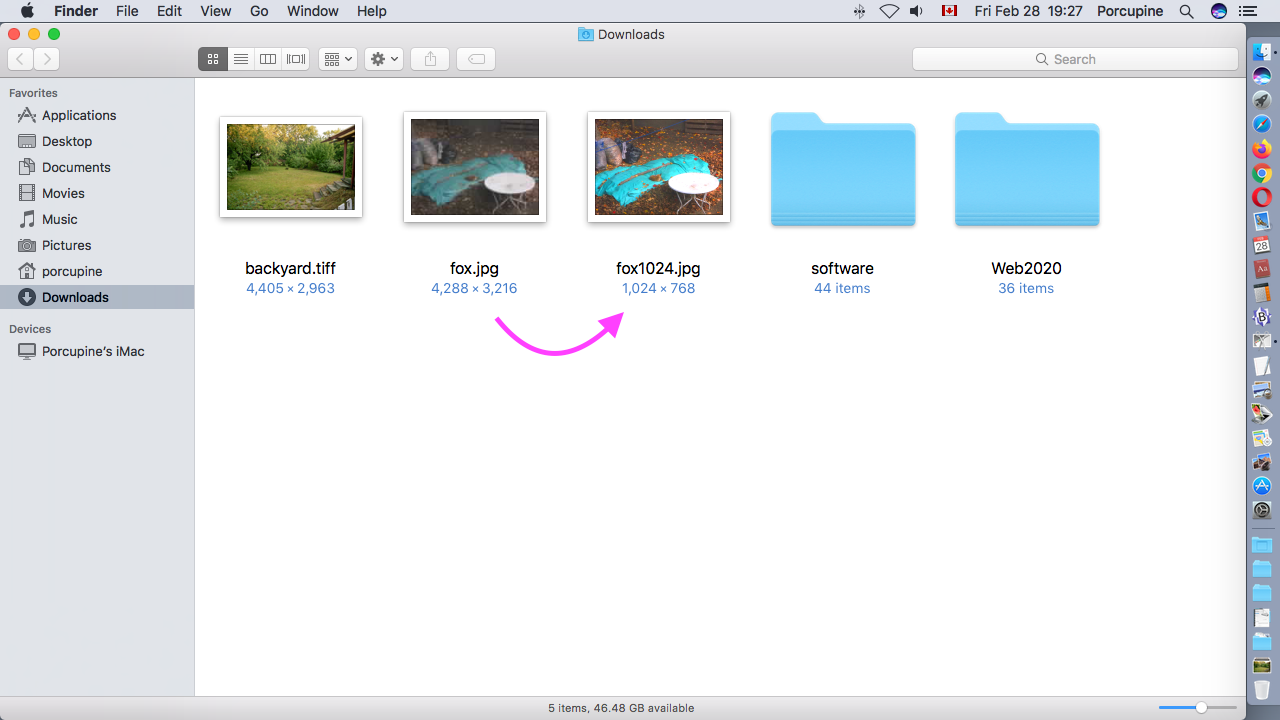
Here is a screenshot of the folders and files of my user account on my computer. You can see the pixel dimensions of my original photograph file and the pixel dimensions of my resized photograph file after using the Affinity Photo application.
Screenshot
All through the lesson my photograph was surrounded by menus taking up lots of space on the screen. But thinking back on what we just did the only menu items I used were found in the Affinity Photo menu with File Edit View Help and other items across the top of the screen. Therefore since I am just a beginner at learning how to use Affinity Photo I started searching around to see if there was a way to get rid of all of those items taking up space on the screen. I would like to have more screen space for my photograph.

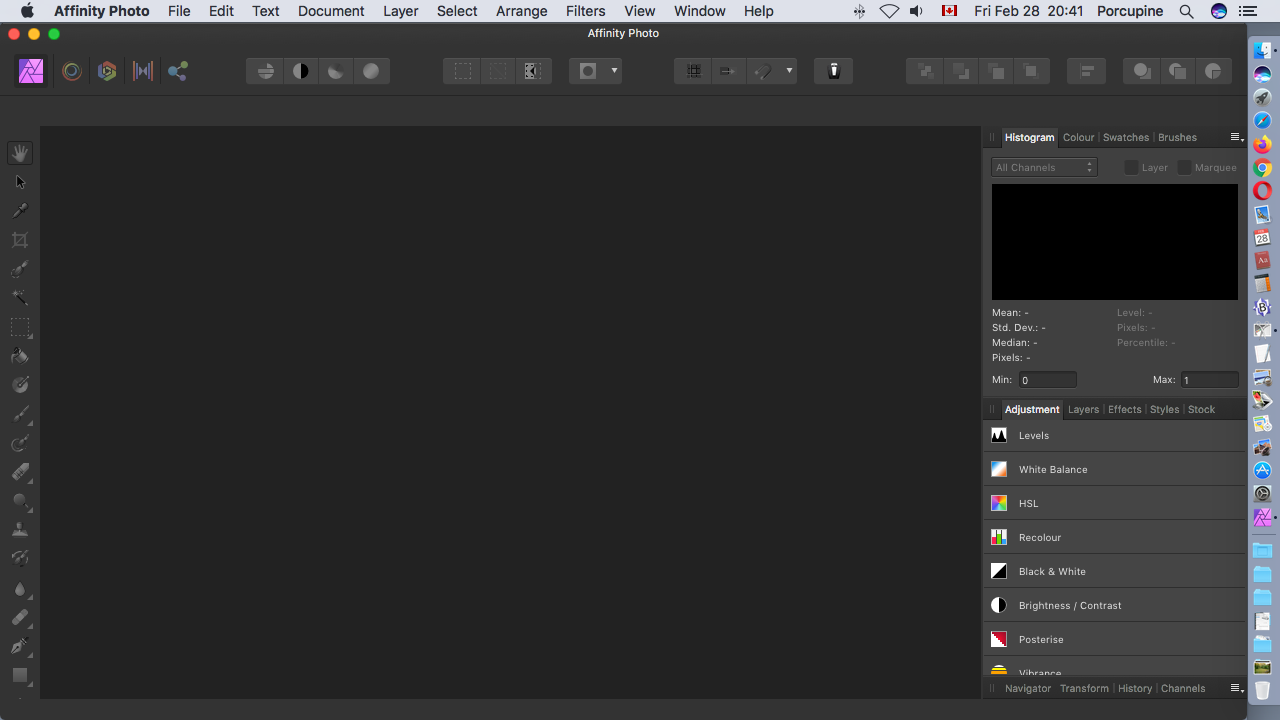
In the View menu at the top of the screen I found the command Toggle UI. Toggle means to turn something off and on like a light switch. UI apparently means User Interface. Sequential mouse clicks of Toggle UI makes all of the menus surround the photograph disappear and reappear.
Screenshot
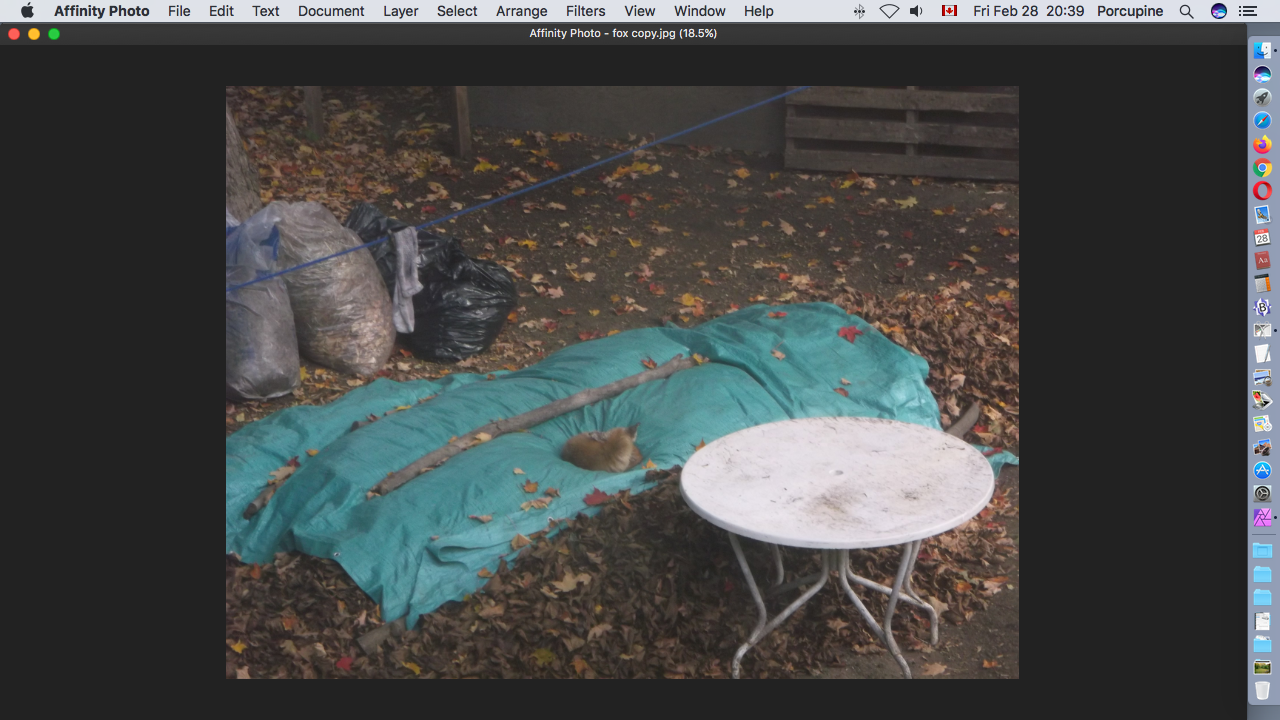
Here is what the screen looks like after using Toggle UI to remove all the menus surrounding my photograph. The photograph is now larger on the screen.
Screenshot
Be aware that after using Toggle UI to remove the user interface this is what the screen will look like the next time you startup the program.