

Some pages of this website may contain advertising and cookies.
Some pages of this website may contain advertising and cookies.
=== by Bob Sutherland ===
This is a lesson on how to use computer software to take a screenshot picture of what is being displayed on your computer screen. There are instructions for four different programs that are each capable of capturing screenshots.
So far I have created beginner lessons on how to use seven different photo editing programs. In each lesson I taught you:
I then created lessons to teach you how to draw shapes or type text on photographs using three photo editing programs. While only some photo editing programs are capable of drawing shapes or typing text on photographs there are other graphics programs that can be used instead. Any programs that I have used always had the same tools and were very similar to the programs in my lessons.
Now I think it is time to teach you how to take a photograph of your computer screen display. A photograph of what is being display by your screen is called a screenshot. Computer software is used to grab or capture the image that is being displayed by your screen and save it as a file.
Once you know how to do a screenshot you can start creating your own lessons. Hopefully I will then be able to slide back into retirement as my services should no longer be required. I wonder, is there any chance I might pick up a camera and try to remember how to use it? I may have joined a community photography club but I cannot remember the last time I lazily loitered around annoying the squirrels by taking their photographs.
The early versions of the Microsoft Windows operating system and the Apple Macintosh operating system both had a very similar way to take a screenshot of your computer screen. It involved pressing down on a specific combination of keys on your computer keyboard all at once. One combination of keys would take a screenshot of your entire screen while a different combination of keys would take a screenshot of the active window that was open on your screen.
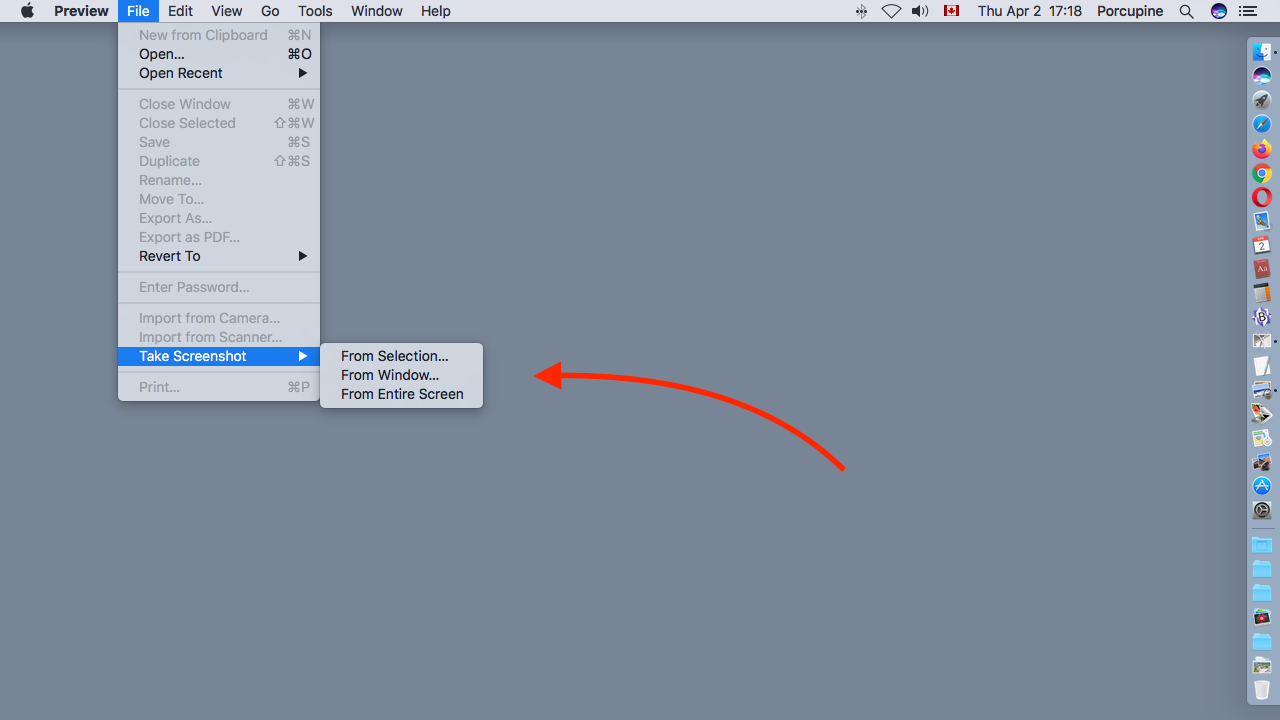
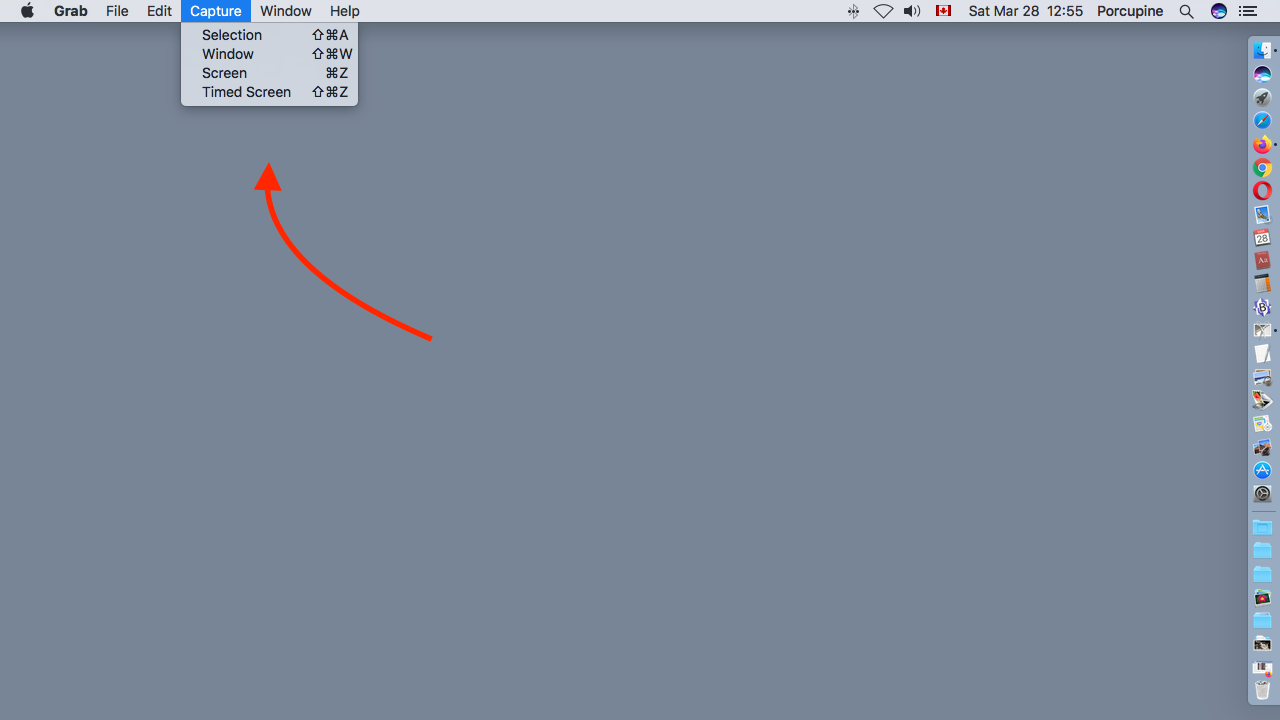
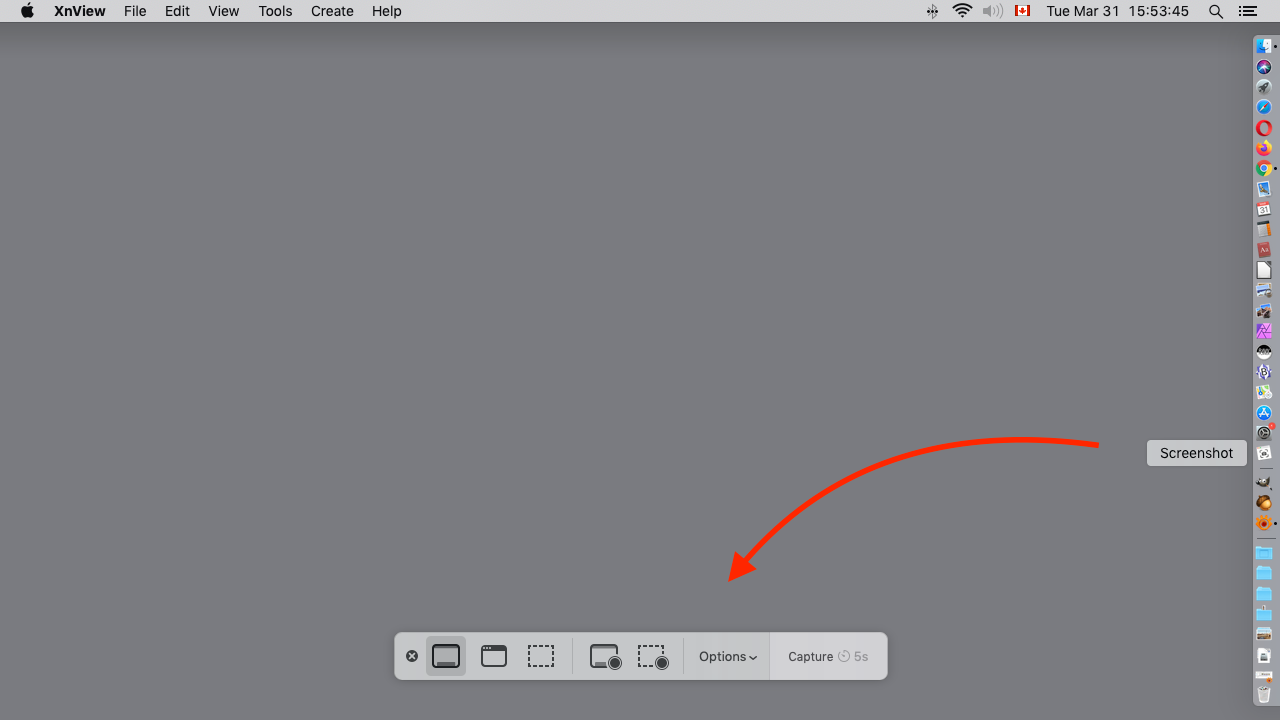
The first option "From Selection" allows you to draw a selection rectangle by holding your mouse button down as you move your mouse in a diagonal line across the screen. Everything inside the selection box will be captured in a screenshot.
The second option "From Window" will allow you to pick a window that is open on your screen. A screenshot will be taken of the window and its visible contents.
The third option "From Entire Screen" takes a screenshot of everything on the screen of your computer. If you have a very large screen on a desktop computer you may want to change its display settings to a smaller pixel dimensions before taking the screenshot.
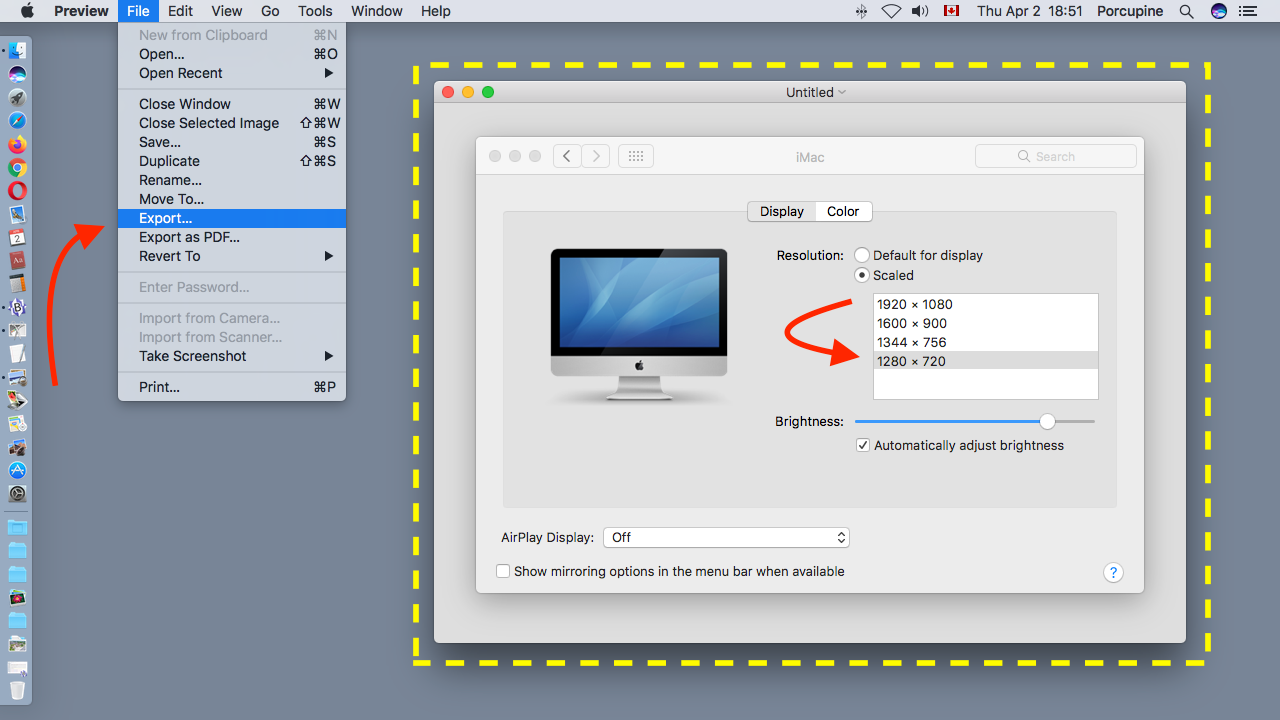
The yellow rectangle is what a selection box looks like in many programs. The outline of the selection box is usually a thin, dotted, grey line rather than this fat, yellow line.
Inside the selection box is a window. This happens to be a screenshot image that I created of the window. The real window is hidden behind the screenshot image.
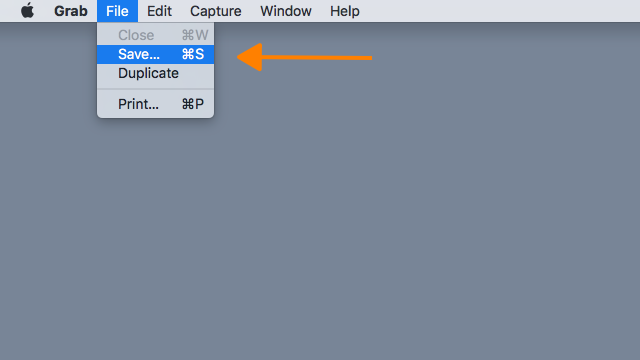
In the Preview application menu you have to open the File menu and use Save or Export to save any screenshots you create. This can be a tricky task if you create a screenshot of the entire screen as the screenshot image will fill the screen covering up the menus behind it.
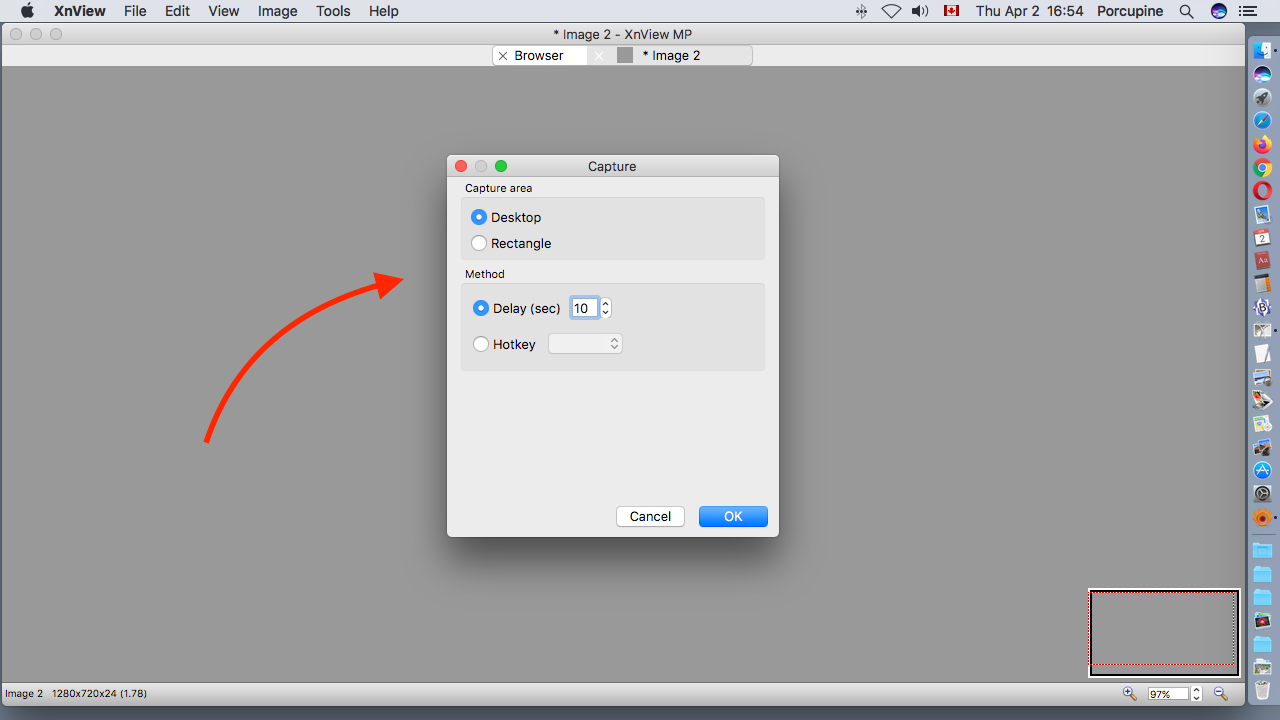
You can set a Delay timer which will give you a few seconds to make adjustments to what is being displayed on your screen before the screenshot happens. In almost all of my screenshots for my lessons I have needed a timer delay of about 10 seconds. That brief time was needed to change which application's menu was being displayed across the top of my screen and then open a menu such as the File menu that I wanted to capture in the screenshot.
The Hotkey setting in the control panel allows you to return to the old way of doing screenshots. You get the opportunity to select from a list a combination of keys on your keyboard that when pressed down together will take a screenshot.
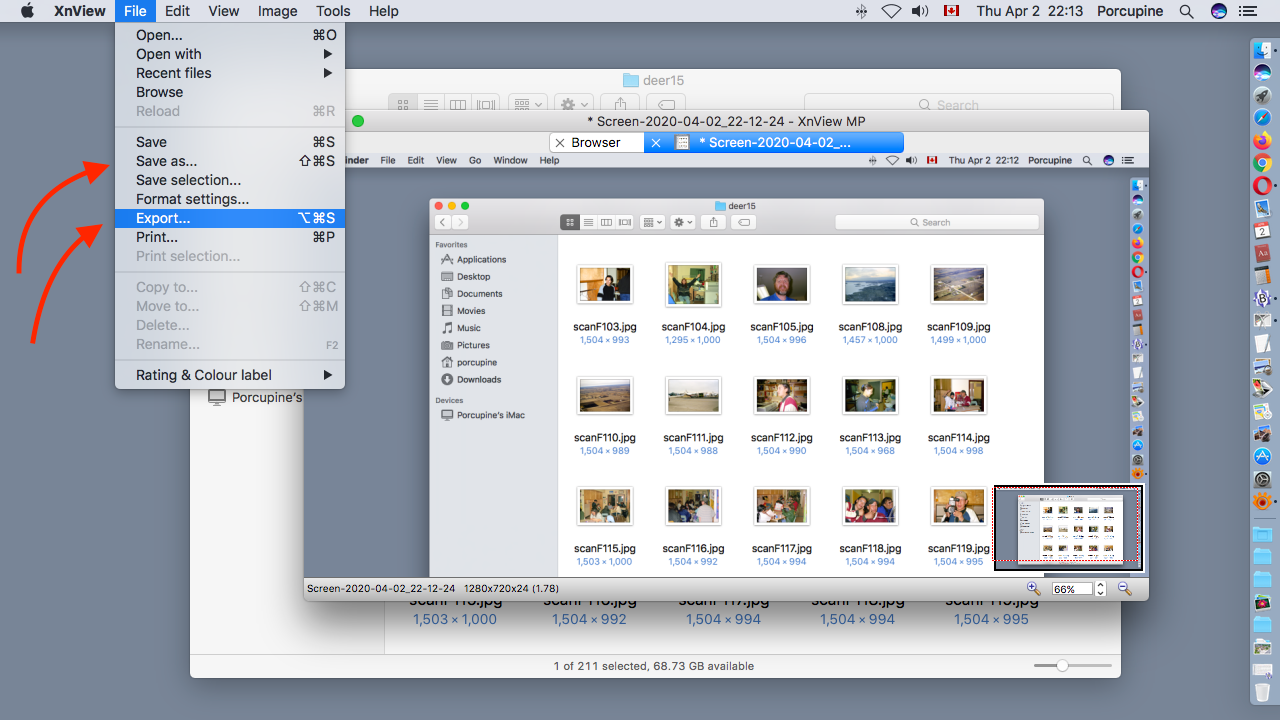
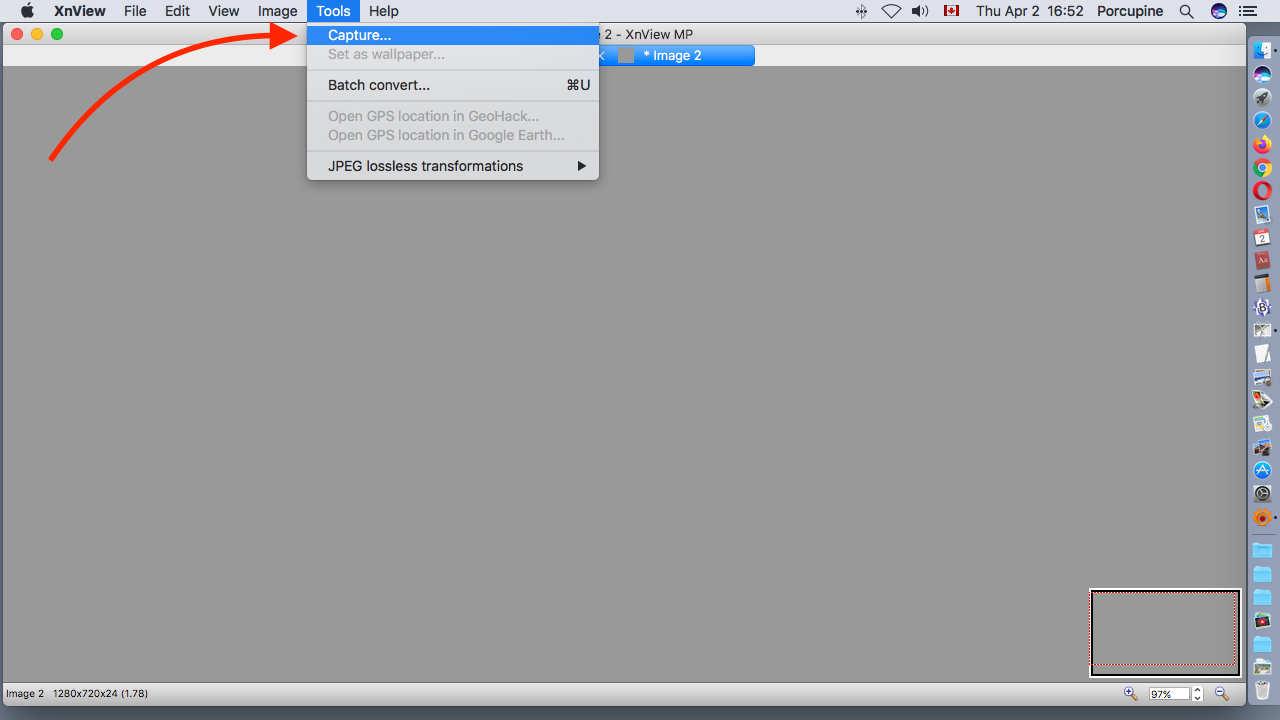
In XnView MP I have to open the File menu across the top of the screen and choose Save As or Export to save my screenshots.

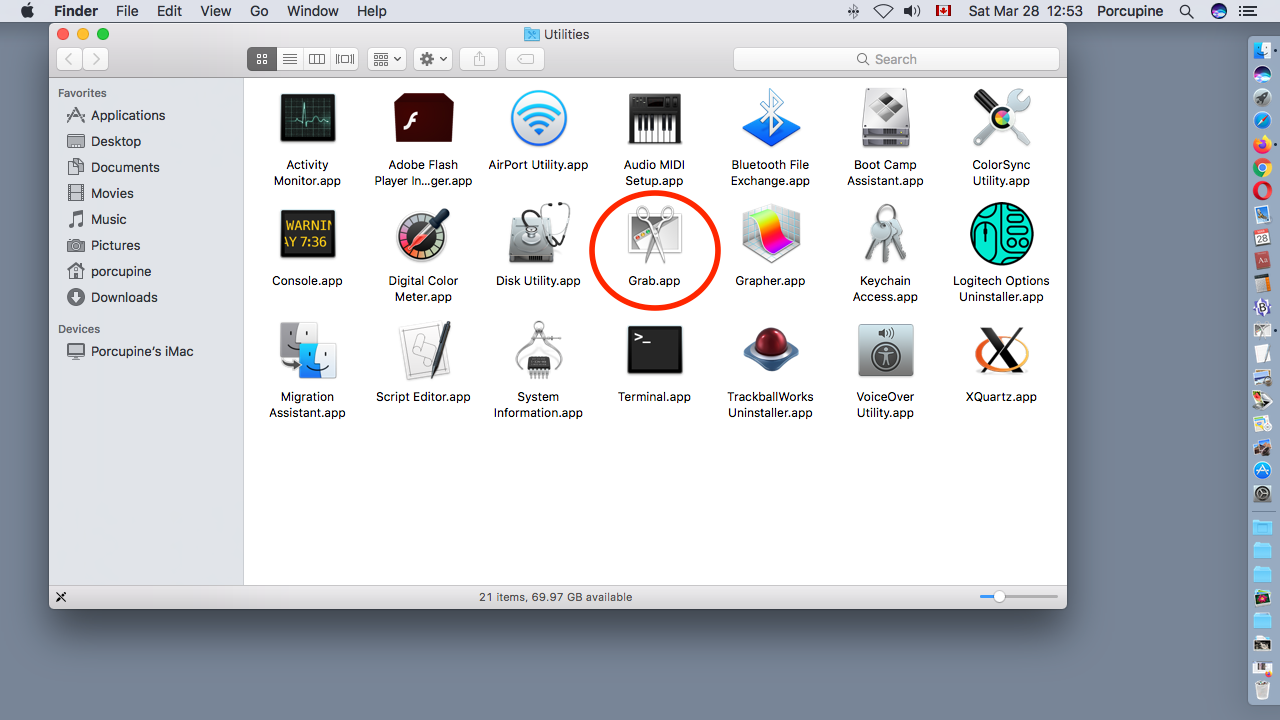
On a Macintosh computer with the Finder menu displayed across the top of the screen open the Go menu and select Utilities.
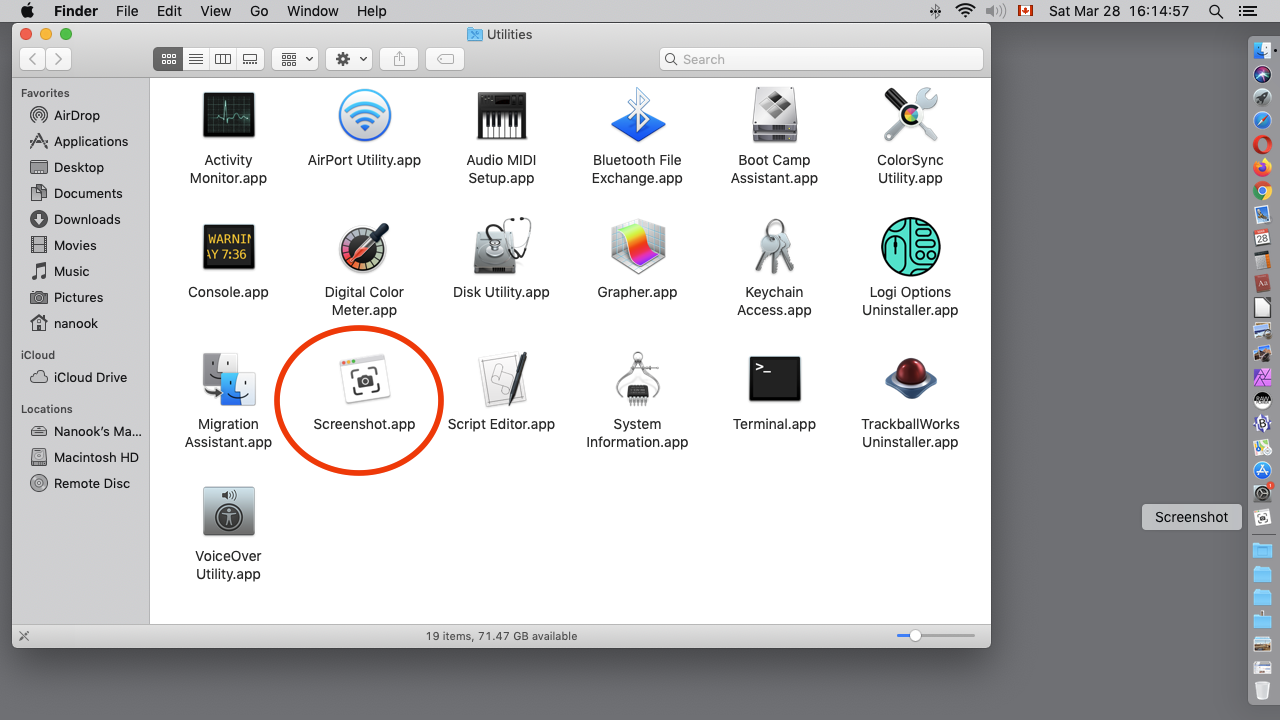
The Screenshot icon will automatically appear in the Dock with the application's name beside it to indicate that the program is running.
From left to right here is what each of the graphic icons mean:
A general rule of thumb is that a program being used to take a screenshot will not capture an image of itself. By this I mean that when you use one of the above programs to take a screenshot all of the menus, icons, selection rectangles and windows needed to take the screenshot are suppose to disappear at the last possible moment so a picture can be taken of what is behind them on the screen.
To take the above screenshots was a coordination challenge as I had to use program A to take a screenshot of program B while program B was in the midst of taking its own screenshot. Your task of just using one program to take screenshots should be a lot easier.