How to resize a digital photograph using Gimp software

=== by Bob Sutherland ===

A lesson on how to resize a digital photograph using Gimp software for Linux, Windows and Macintosh computers.

GIMP = GNU Image Manipulation Program.

GIMP is a drawing, illustration and photo editing program that was developed as an open source project on Linux computers. Free download versions of the program are available for Linux, Windows and Macintosh computers.
https://www.gimp.org

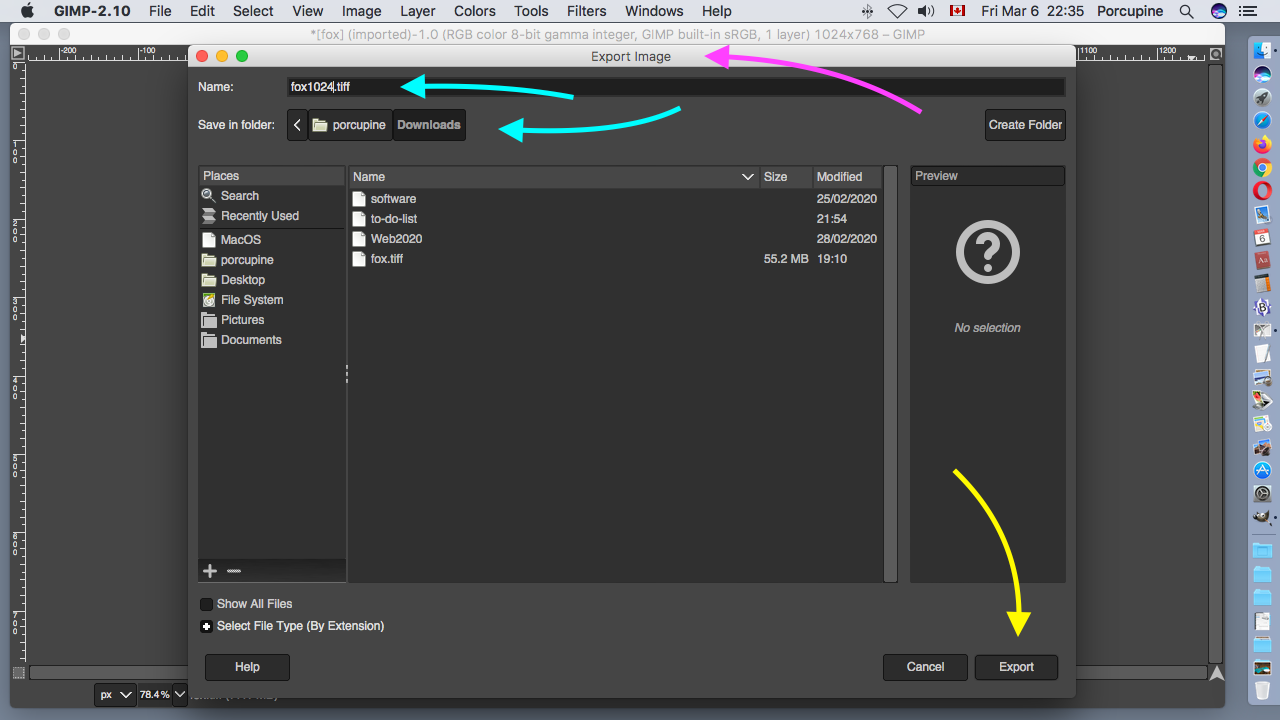
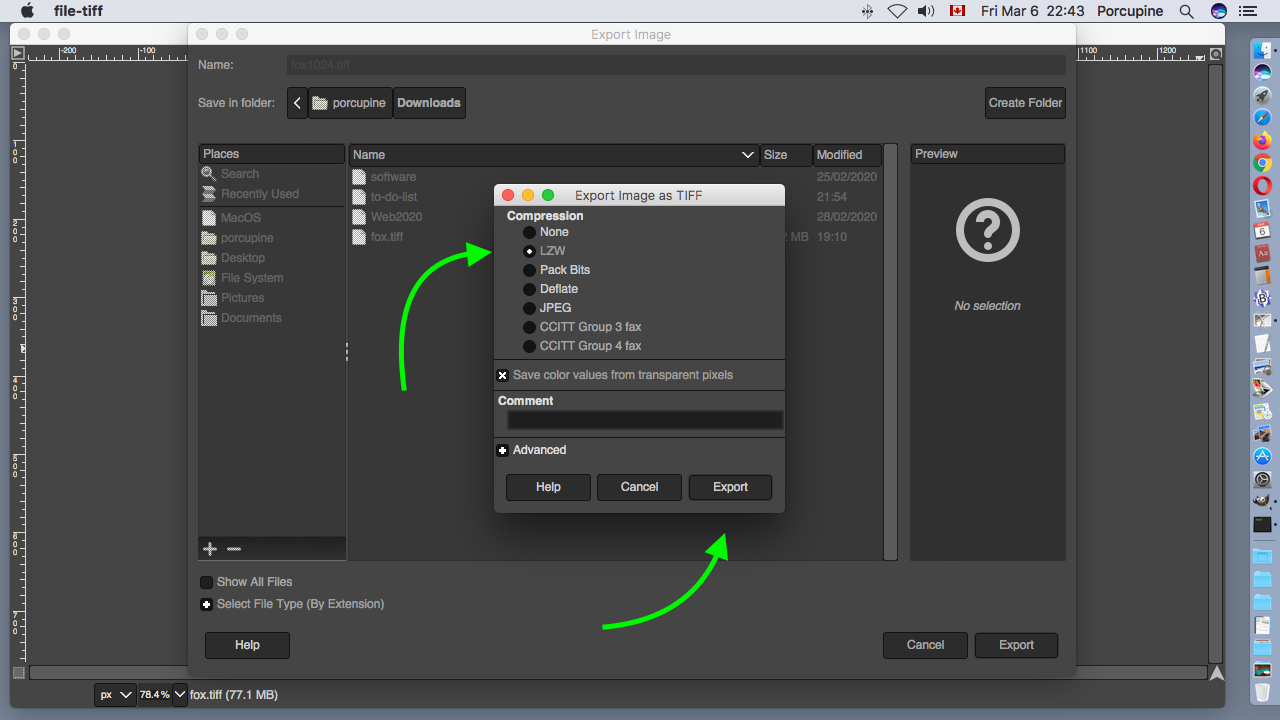
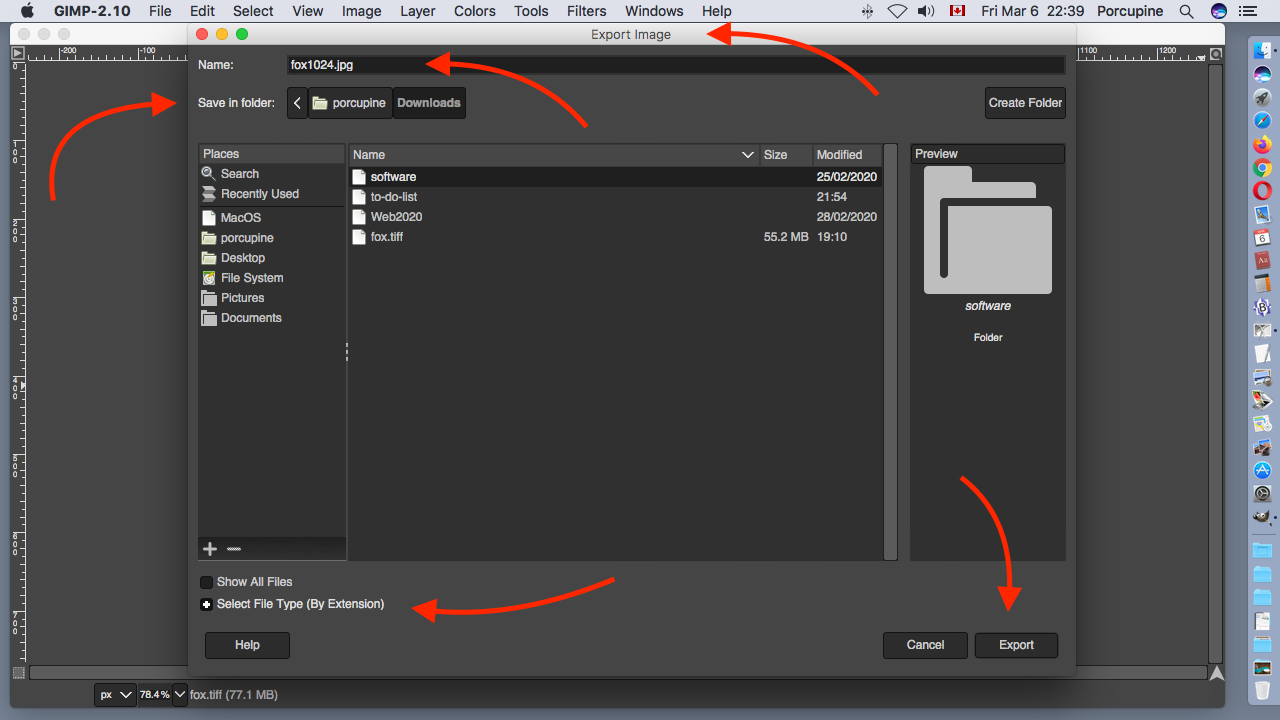
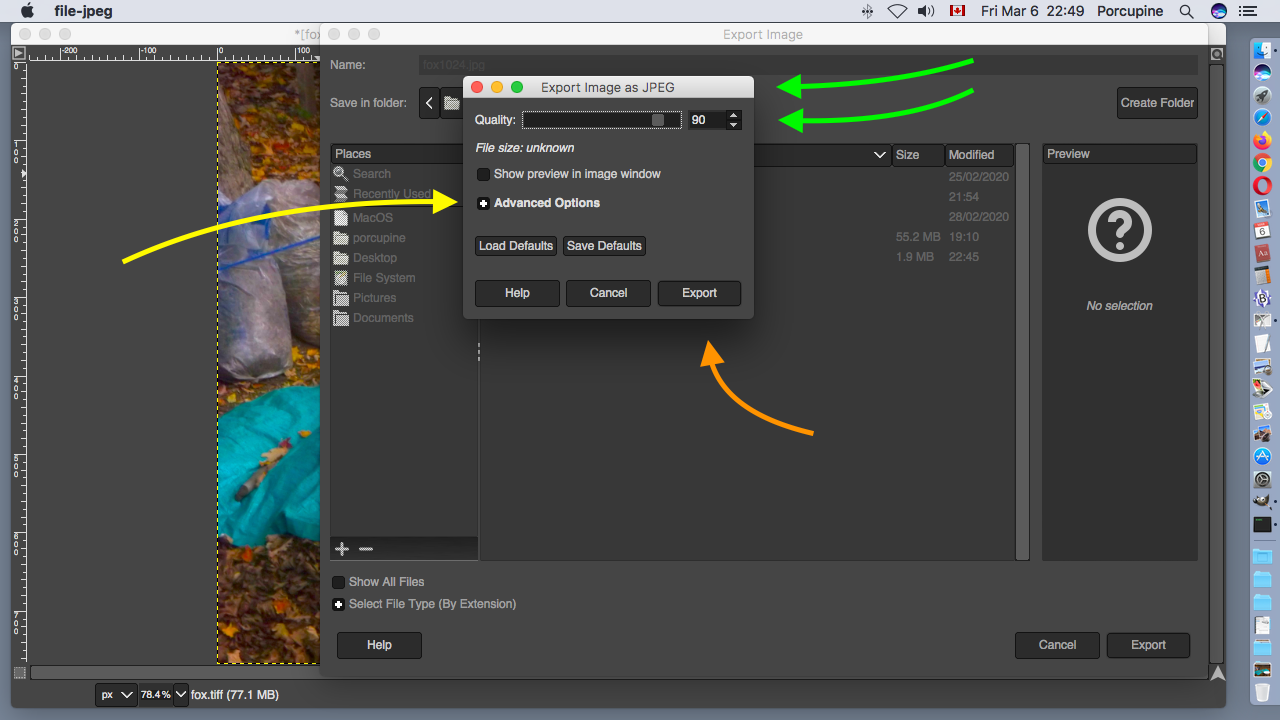
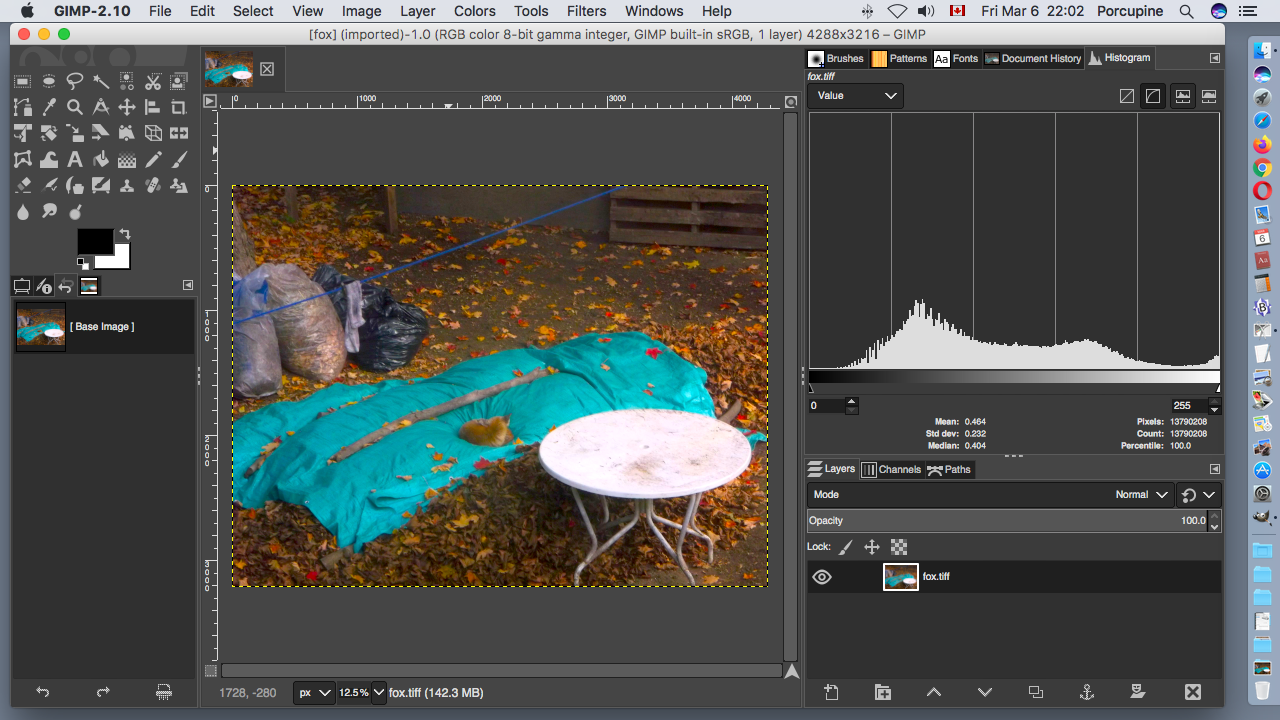
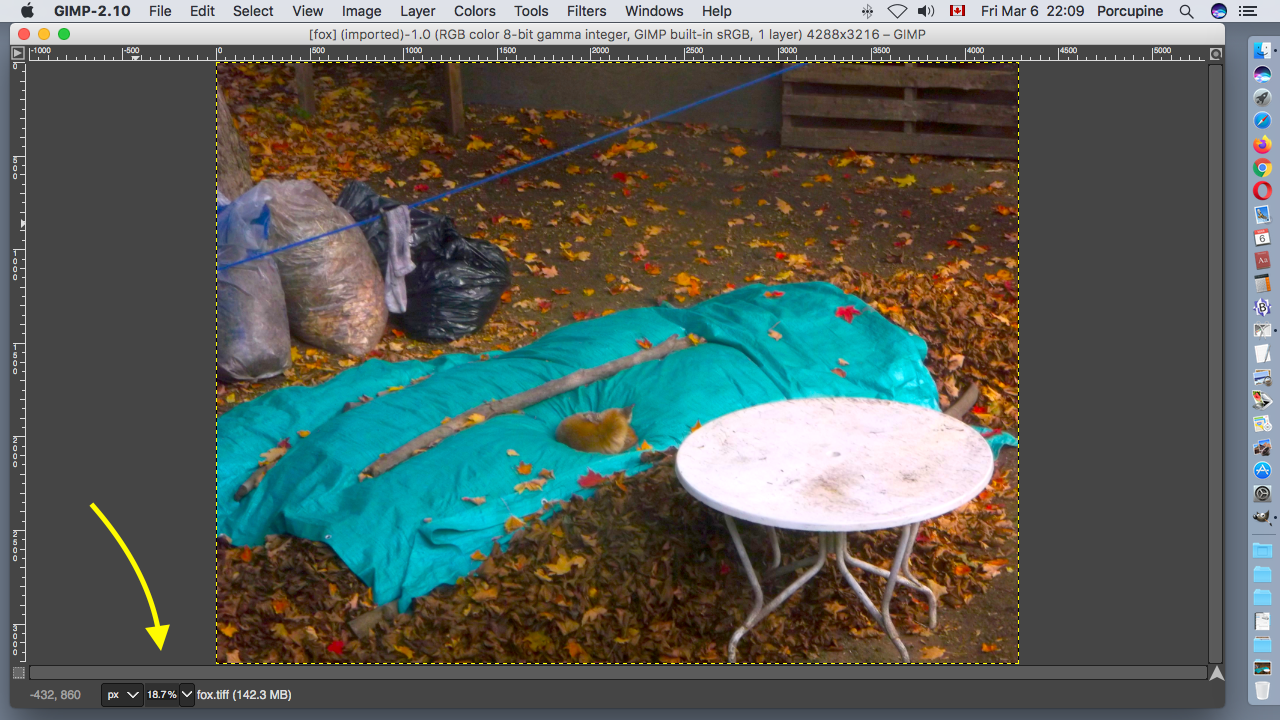
The following are screenshot images I captured of my Macintosh computer screen as I worked through the process of resizing a digital photograph. I do not have a Windows or Linux computer to test those versions of the software.


Gimp application icon
This is what the Gimp version 2.10 application icon looks like on my Macintosh computer.

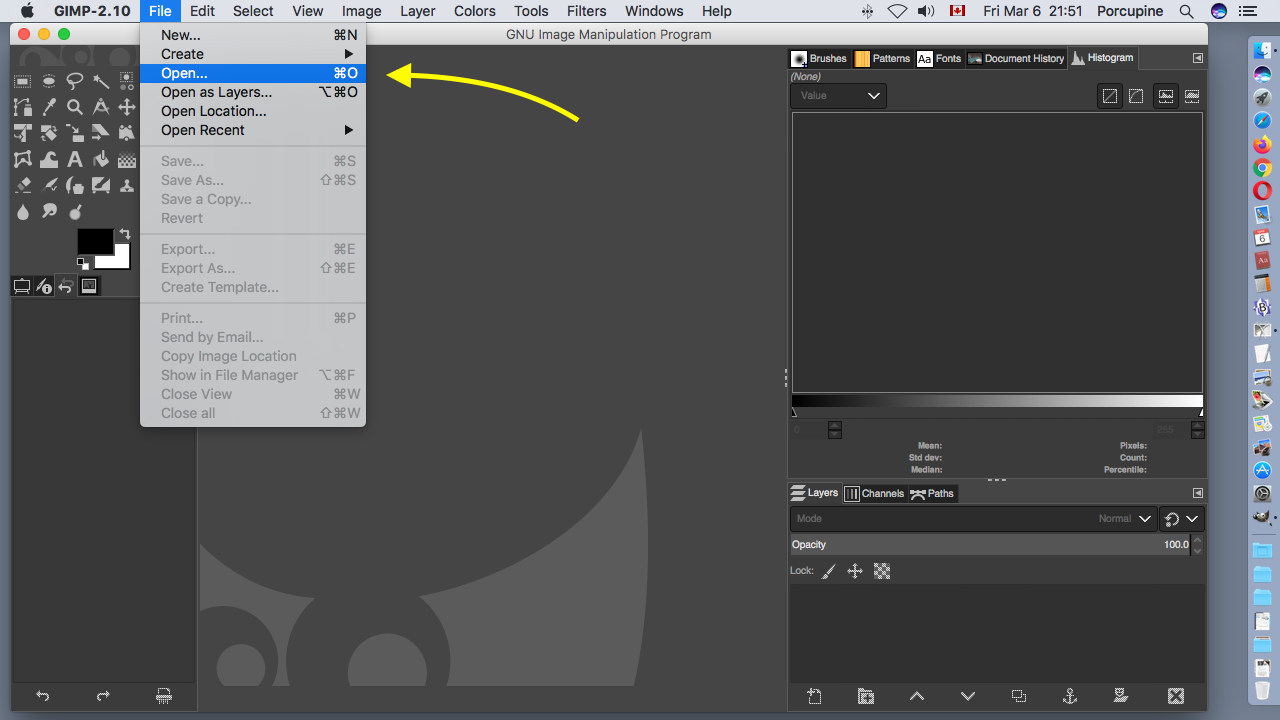
The first step is to start up the Gimp application and open a file that contains a photograph. There are many different ways you can accomplish this task.

On a Macintosh computer you may find the Gimp.app icon in the Dock at the bottom or side of your screen. You should find the Gimp.app among all your application icons displayed by the Launchpad. Alternatively you can look for the Gimp program in the Applications folder on your hard disk.

Screenshot
This is the Gimp window I saw after starting up the program.
Screenshot
In the Gimp-2.10 menu across the top of the screen select the File menu and Open command.
Screenshot
This window will appear allowing you to search the folders and files of your computer account to find the photograph that you want to resize. In this case I am about to open the photograph file named fox.tiff that I found in my Downloads folder.
Screenshot
There seems to be a problem! A dialogue window with an error message has suddenly appeared in the middle of my screen. While attempting to open different photographs I often see this error message so I have included it in this lesson.

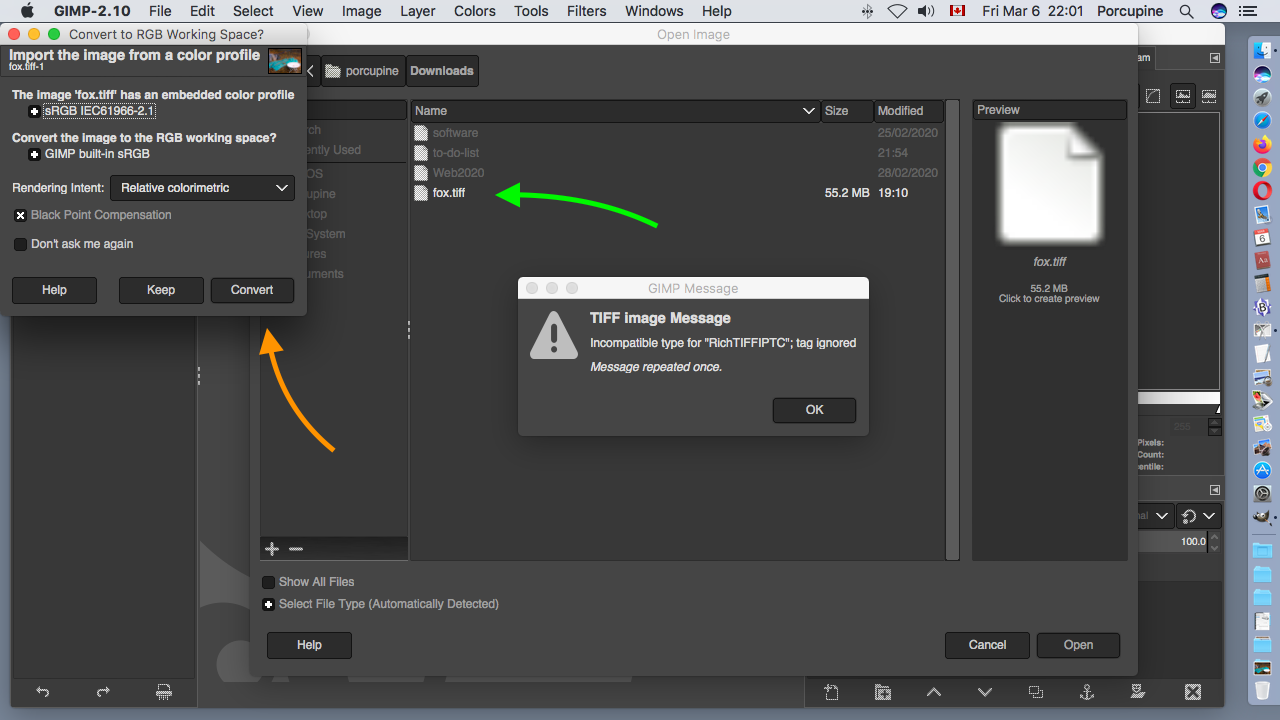
In the top left corner of my screen a second window has appeared. In the title bar beside the red, orange and green dots is the title Convert to RGB Working Space?.

My interpretation after reading this second window is that my photograph file contains an embedded version of the sRGB IEC61966-2.1 colour profile. It is a very common colour profile. By default all photographs on the Internet are displayed using the sRGB IEC61966-2.1 colour profile unless a different colour profile is embedded in the photograph file.

Apparently Gimp either does not allow photographs to have their own embedded colour profiles or it just does not like the standard sRGB IEC61966-2.1 colour profile. Gimp wants to convert my photograph to use Gimp's own built in sRGB working space. The only way that I can proceed with this lesson is to press the Convert button.

Screenshot
Here is my photograph of a fox sleeping on top of a tarp. The tarp is covering a pile of leaves.
Screenshot
The space available for my photograph on the screen is relatively small. During practice runs of this lesson I discovered that I was not using any of the tools or menus that are taking up so much space on the screen. Let us get rid of them.

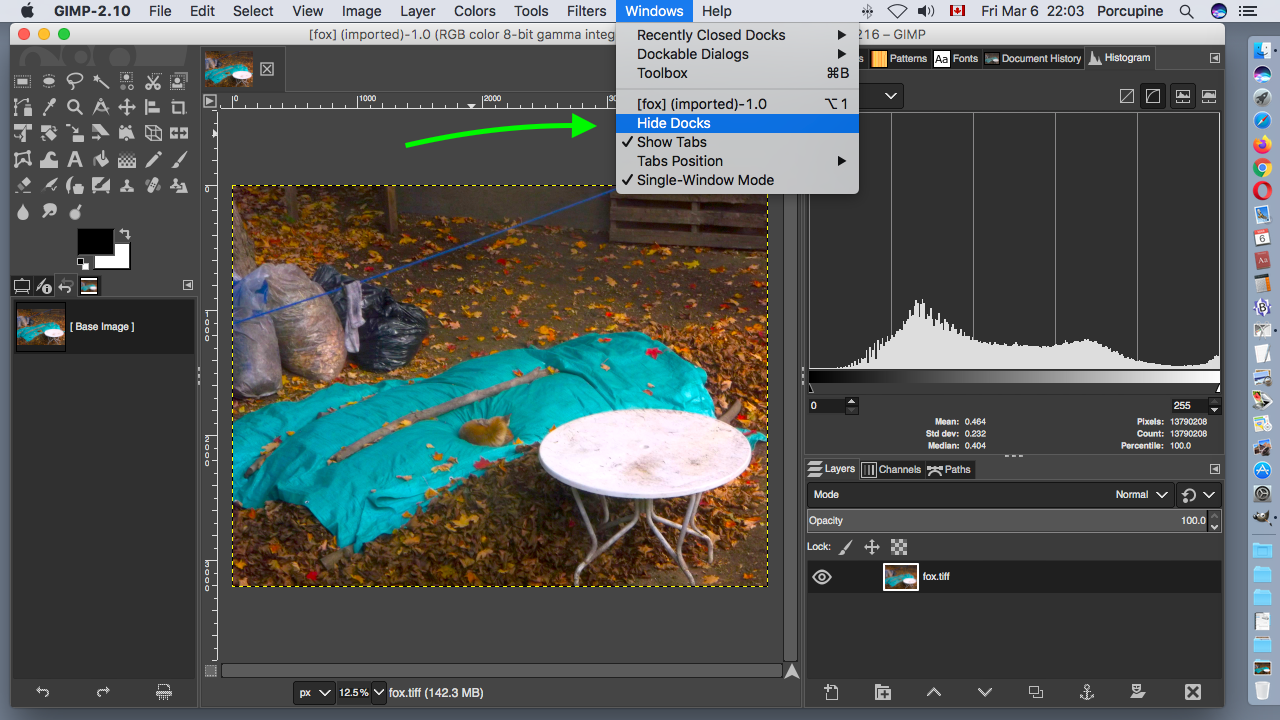
In the Gimp-2.10 menu across the top of the screen open the Windows menu and mouse click on the command Hide Docks. This action should cause a checkmark to appear in front of Hide Docks that you probably will not see until the next time that you open the Windows menu.

Screenshot
Well we have removed all the clutter on the screen but my photograph has not changed its size. Along the bottom of the screen there is a menu that allows you to zoom the displayed photo larger or smaller as a percentage of its real size.
Screenshot
In the Gimp-2.10 menu across the top of the screen open the View menu and mouse click on Zoom. A whole bunch of options now appear in a submenu. You can experiment around trying many of these options in the submenu. I usually find Fit Image in Window is a good choice.
Screenshot
Here is my photograph zoomed large. The menu across the bottom of the screen indicates that my photograph is being displayed at 18.7% of its full size.
Screenshot
It now time to focus our attention on trying to resize the pixel dimensions of our photograph rather than just zooming the displayed image larger or smaller. In the Gimp-2.10 menu across the top of the screen open the Image menu. The Canvas Size and the Scale Image commands look like interesting options we can try.
Screenshot
This is the window that appeared on my screen after choosing Canvas Size in the Image menu. I tried reducing the Width to less than half by typing in 2048. The Height automatically changed to maintain the photograph's width to height ratio. In the middle of the Set Image Canvas Size window there is a small picture of my photograph with a rectangle outline drawn on it. With my mouse I can move that rectangle outline around to anywhere I want on the small photograph. If I mouse click on the Resize button my photograph will be cropped down to what I saw in that rectangle outline.

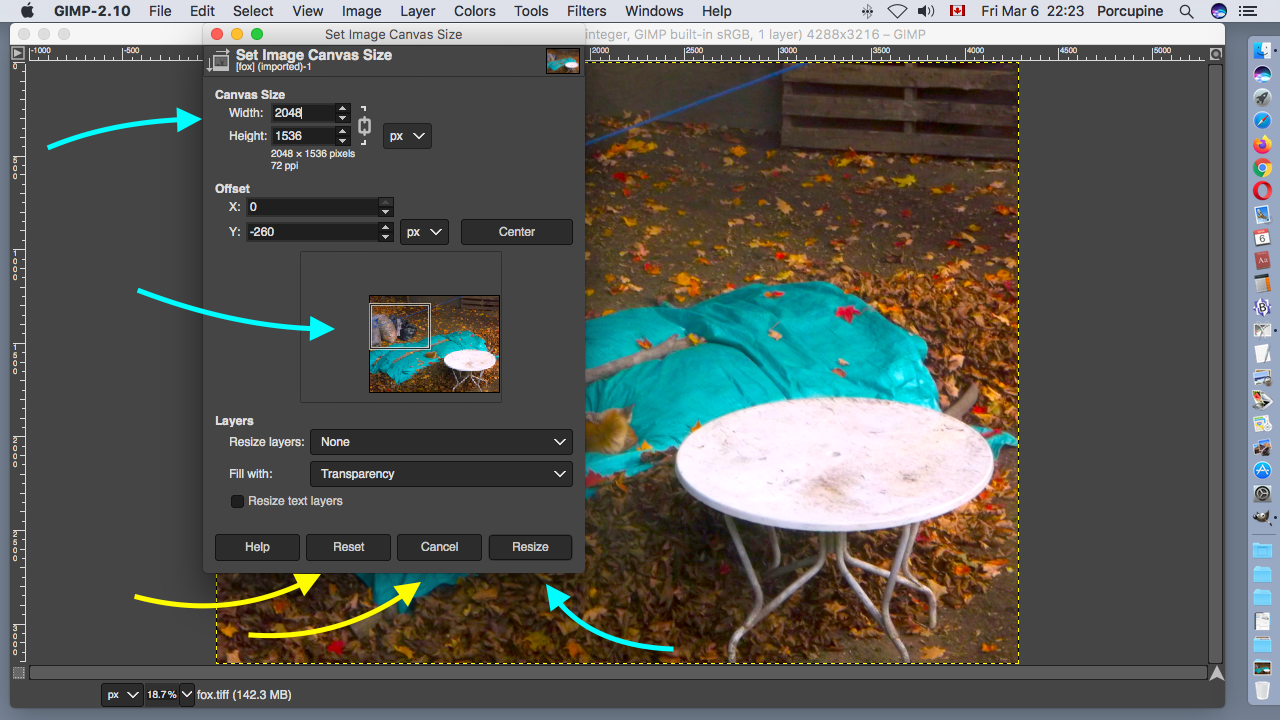
I do not want to crop my image in this lesson! I want to proportionally resize it! I therefore pressed the Reset and Cancel buttons.

Screenshot
This is the window that appeared on my screen after choosing Scale Image in the Image menu. Notice the funny looking symbol that connects the Width and Height boxes. The same symbol appears connecting the X-resolution and Y-resolution boxes. This funny looking symbol connecting the boxes indicates that any change to the value of Width will automatically cause Height to change proportionally to maintain the width to height ratio of the photograph.
Screenshot
Here I have moused clicked on that funny looking symbol and its appearance has changed breaking the connection between the Width and Height boxes. If I type in a new value for Width the value for Height will not automatically change. Typing in a new value for either Width or Height will now cause the shape of my photograph to change distorting the image.
Screenshot
Here I have mouse clicked on the funny looking symbol to restore the connection between the Width and Height boxes. I type 1024 into the Width box to resize the width of the photograph to 1024 pixels. The Gimp program automatically calculates the new value for Height to maintain the width to height ratio of the photograph. I click the Scale button.
Screenshot
I have achieved the main objective of this lesson. I have resized my photograph. You may not have noticed it but the size of my photograph measured in pixels was listed at the end of the title bar in previous screenshots. Now the new smaller size of 1024 x 768 pixels is shown in the title bar of this window at the top of the screen.

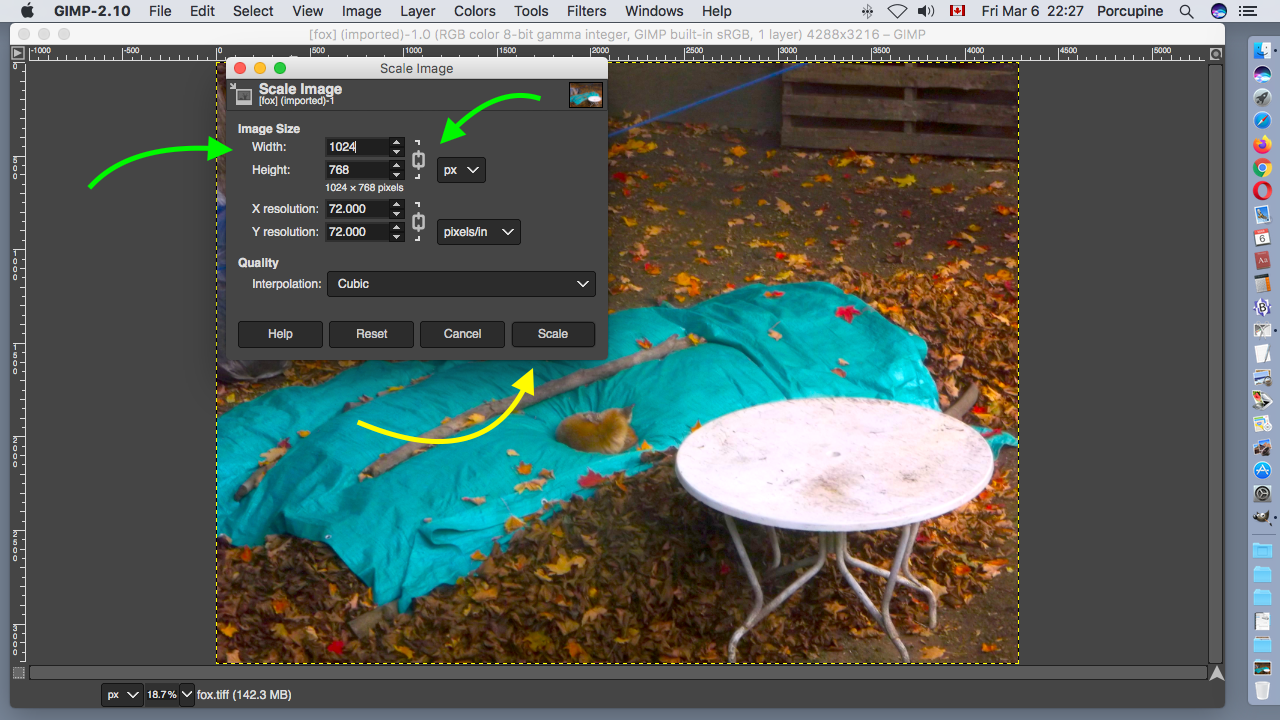
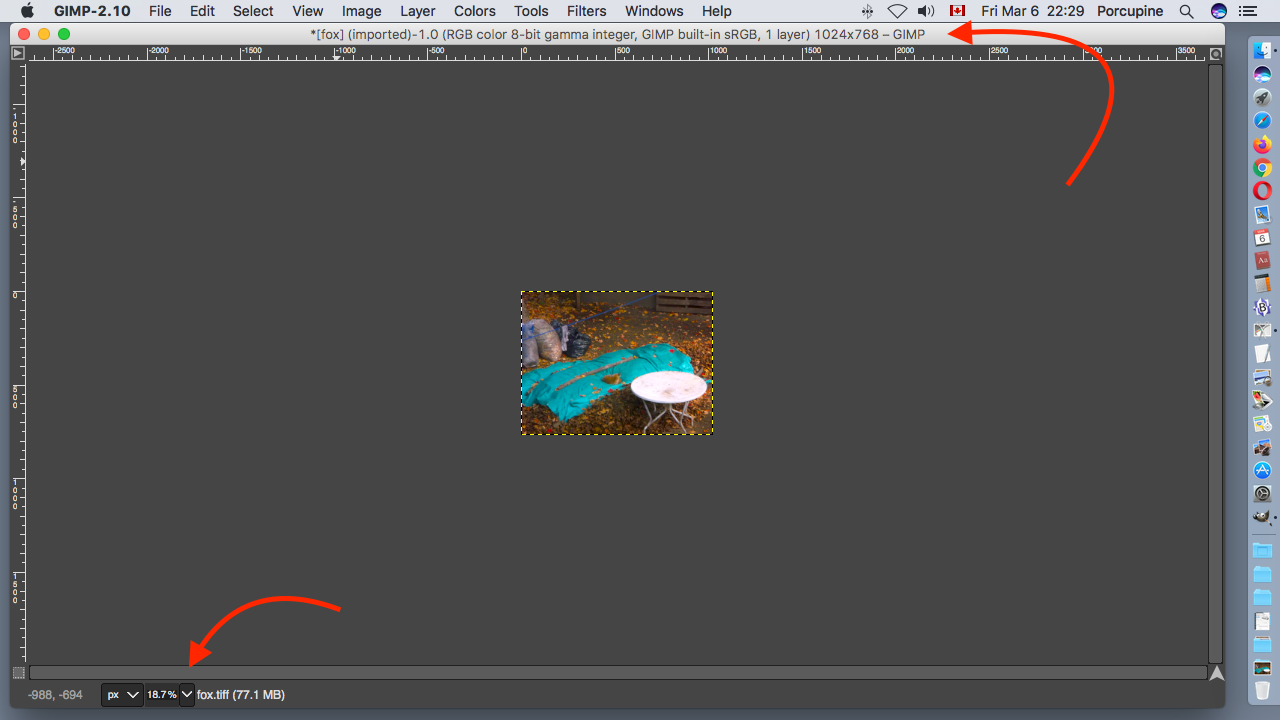
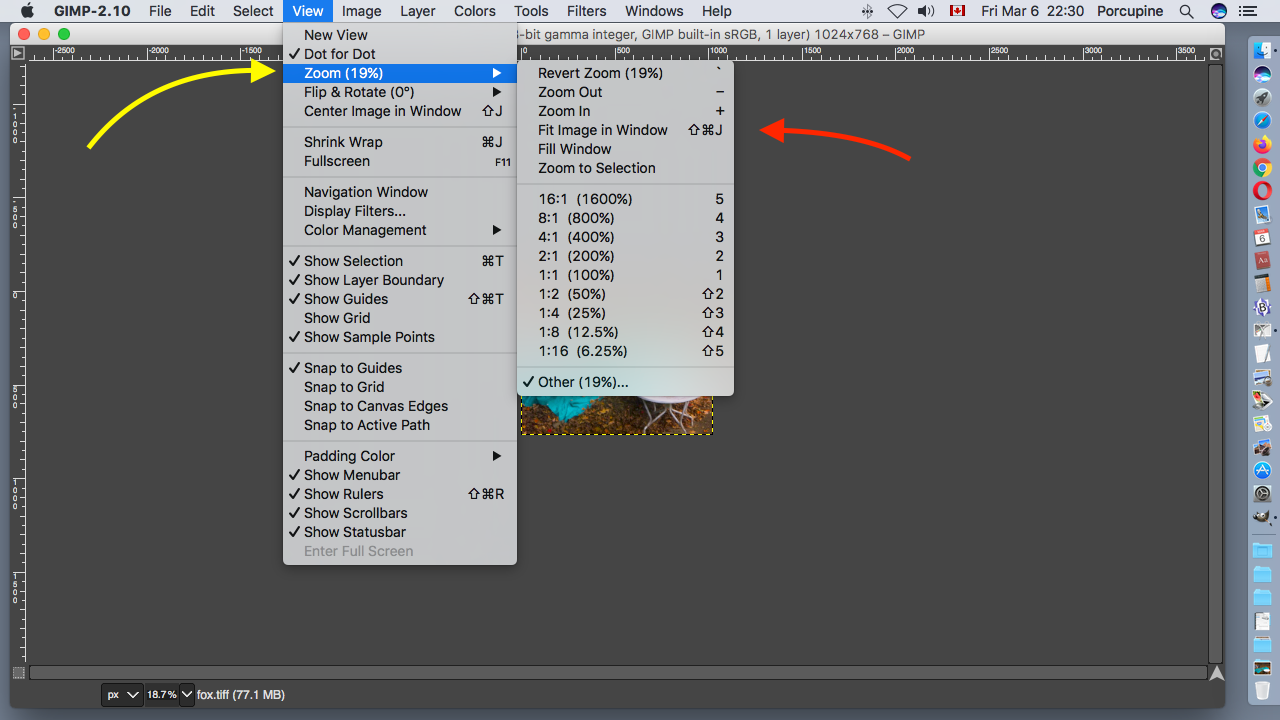
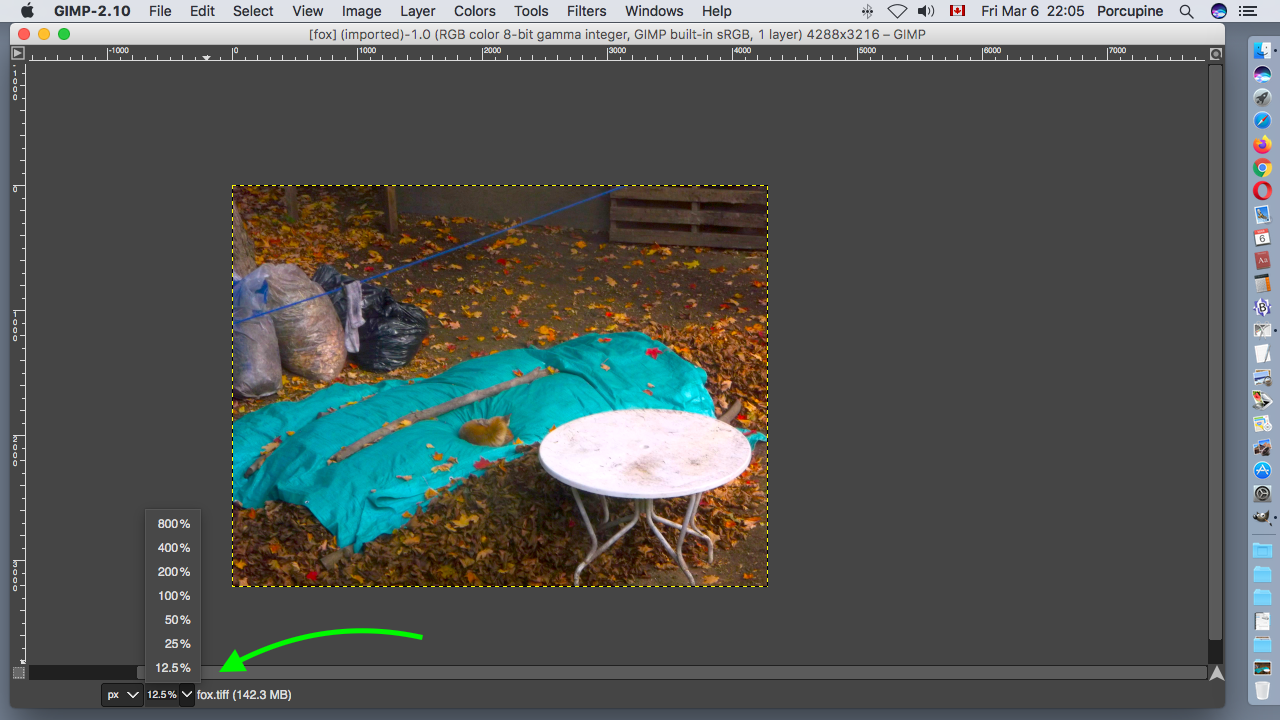
Across the botton of the window the display zoom size of 18.7% has not changed.

Screenshot
It is time to go back to the View menu across the top of the screen and choose Zoom. In the submenu that appears choose an option that will cause your photograph to zoom larger on the screen.
Screenshot
Here is my resized photograph zoomed as large as I can display it on my screen.
Screenshot
Now we are faced with the task of trying to save our resized photograph using a new filename. We do not want to accidentally erase our original photograph. In the File menu across the top of the screen there are a few options containing the word Save and Export.
Screenshot
Here is the Save Image window I saw when I chose Save As in the File menu. The Gimp program wants to save the photograph using a Gimp file type with file extension .xcf . Selecting this option will create a file that only the Gimp program can open. I want to save the photograph using a JPEG or TIFF file type so I mouse clicked on the Cancel button.
Screenshot
Here is the Export Image window I saw after choosing Export As in the File menu. My original photograph was named fox.tiff so the TIFF file format is automatically selected. I change the filename to fox1024.tiff so that it will not overwrite and erase the original photograph file. Normally I should be saving the photograph to my Pictures folder but it is so full and cluttered that for the purpose of this lesson I am using my nearly empty Downloads folder. I mouse click on the Export button.
Screenshot
Here is the Export Image as TIFF window that popped up on my screen when saving a TIFF file. I select the LZW compression to create a smaller file that will take up less space on my computer's harddrive. I know from previous experience that the other programs on my computer should all be able to open a LZW compressed TIFF file but that is something you may need to check for your computer. When I click the Export button the new file is saved.
Screenshot
Here I have returned to the Export Image window I saw after choosing Export As in the File menu. I have changed the original filename from fox.tiff to fox1024.jpg to create a JPEG file. The file is about to be saved in my Downloads folder. I mouse click on the Export button.
Screenshot
Here is the Export Image as JPEG window that popped up on my screen when saving a JPEG file. The picture quality slider was set to 90 by default. Out of curiosity I mouse click on the plus sign before Advanced Options.
Screenshot
The window changes to show many options that I can change when saving a JPEG file. After reading through the list I decided to leave everything at its default setting and just mouse click the Export button to save the file.
Screenshot
I have now completed the main tasks of this lesson and can quit the Gimp application. If I mouse click on Gimp-2.10 between Apple's logo and File across the top of the screen a menu will appear with the Quit command.
Screenshot
Here is a screenshot of my Downloads folder showing the original fox.tiff file and the resized fox1024.jpg and fox1024.tiff files I created in this lesson.
Screenshot
The next time you start up the Gimp program this is what the screen will look like.
Screenshot
If you want to see all of those tools and menus that were cluttering up the screen because they may be useful for some tasks such as drawing pictures or enhancing the colour of photographs then you can make them reappear. Just go up to the Window menu across the top of the screen and mouse click on Hide Docks to remove the checkmark.